Your next world starts here.
PAUTINKA / WORLD WORKSHOP

Terra WorksAll In One

Your next world starts here.

Shape editable landscapes, change the seed, and build surfaces, caves, grottoes and floating islands. Start with a recipe. Make the world your own.

Unreal Engine 5.3–5.8Unreal Editor toolsGuide in 10 languages
Illustration
FROM AN IDEA TO EDITABLE TERRAIN

Choose. Shape. Look. Keep.

Unreal interface

The actual workshop

Real screenshots of all seven tabs in Unreal. The plugin interface has seven languages; this guide has ten.

Unreal interfaceWorld type
Fab / Terra Works

Install from Fab. Open your workshop.

Install Terra Works All In One through Fab for the Unreal Engine version you use. The supported range is Unreal Engine 5.3–5.8.

  1. 01

    Sign in to Fab with the Epic Games account you use in the Epic Games Launcher, then acquire Terra Works All In One so it appears in your library.

  2. 02

    Save your project and close Unreal Editor. In the Epic Games Launcher, open Unreal Engine → Library and find Terra Works All In One in Fab Library. Refresh the library if it has not appeared yet.

  3. 03

    Choose Install to Engine, select the required supported Unreal Engine version, and complete the installation. If you work with several engine versions, install the matching plugin version for each one you use.

  4. 04

    Open your project in that engine version. Go to Edit → Plugins, search for Terra Works All In One and enable it. Allow its required Unreal dependencies and restart the editor when requested.

  5. 05

    Open Tools → Pautinka → Terra Works All In One. Choose the interface language at the top, then start with a small preset and its preview. The continent can wait until the buttons feel familiar.

In the Launcher, refresh Fab Library when a newly acquired plugin has not appeared yet. Choose the matching engine version before pressing Install.

For native Unreal Water, open Terra's Water tab and use Set up Unreal water collision when the project needs it.

Use the language selector at the top of Terra to choose the interface language. Use the selector on this website for its ten-language guide.

01 / World type

Choose a place to start

A preset is a starting recipe for a kind of place: a valley, a coastline, a caldera, a stylized world or something less familiar. It supplies sensible layers, shaping and surface choices so you can spend the first few minutes looking at the land. After choosing it, every part of the recipe remains editable.

IllustrationChoose a place to start
  1. 01

    Open World type and filter the catalogue by category. Use the search field when you know part of a preset's name; clearing it brings the category's full list back.

  2. 02

    Choose a preset whose main outline suits your level. Look at coastlines, high ground and possible routes before worrying about whether the rock is the perfect shade of grey.

  3. 03

    Try New map variation to explore several arrangements. When one feels promising, keep its seed and move on to dimensions and relief.

  4. 04

    Save the whole recipe when you have a useful direction. It keeps far more of your decisions than a seed written on a sticky note.

Find the right starting recipe

Use the category filter to narrow the catalogue, then search by part of a world name. Choose a recipe for its large forms: coastline, valleys, ridges or broad flat areas. The catalogue contains 320 starting recipes and 128 height fields across 16 terrain families. Once you have a useful starting point, change its sources and shape settings to make it your own.

Choose how a source should vary

Enable Generate new shapes from the seed when you want another arrangement from the chosen height family. Turn it off when you want to work with the library's saved shape. For an imported height image, use layer scale, rotation, offsets and influence to position its existing features.

Check the new recipe

After choosing a preset, review its main shape, layers, size and starting surfaces. Keep your World Partition grid preferences in Map dimensions and inspect their blue and orange preview lines with the new terrain. When switching from a small island to a mountain map, revisit travel distances and height before creating.

Continue shaping after creation

Create the Landscape when the preview is useful, then use Unreal's sculpting and painting tools to refine the ground in the level. Save the edited level and assets. Keep a Terra recipe alongside them when you also want to return to the generation settings or create another variation.

Settings

World category

Filters presets by their world category, such as natural, animated or alien. Choose a preset from the filtered list to load its starting settings. The category filter helps find a starting point; your world remains editable after choosing it.

Find a world

Filters the visible list by the text you enter. Type part of a name to find the item, then select it to use it. Clearing the field shows the full list allowed by the current category. Searching does not change the map.

02 / Seeds & variations

Keep the idea. Change the arrangement.

Seeds let one recipe produce different worlds. They change procedural hills, valleys and outlines while the recipe keeps the kind of place you chose. A useful variation is repeatable when the seed, settings, source assets and recorded generator version stay together. Save the recipe rather than relying on a number alone.

IllustrationKeep the idea. Change the arrangement.
  1. 01

    Press New map variation a few times while keeping the preset and other controls unchanged. Compare the large forms from above and at an angle.

  2. 02

    Once the composition works, keep the Map seed. Change height, layer strength or smoothing one at a time so you can see which decision helped.

  3. 03

    Leave New variation on each creation off when you want the created terrain to match the preview you inspected. Turn it on when deliberately making a run of different maps.

  4. 04

    Save a named recipe. Loading it restores the recorded seed and generation settings instead of choosing a fresh preset variation.

Variation strength

This controls how far seed-based variation may move away from a base composition. Low values keep a stronger family resemblance; high values allow more movement in the large forms. It works with procedural layers. It is separate from small surface noise and from the seed used to arrange cave rooms.

Save a variation you want to repeat

Keep the seed with the complete recipe. Use Save recipe after changing sources, mixing order, dimensions, shaping or surfaces. When moving to another project, bring the referenced imported sources and project assets too. Load that recipe to recover the settings before updating the preview.

Continue an older recipe

Load the saved recipe to continue its existing shape. For an older cave or grotto, choose Use the new cave schemes when you want to try the current route builder. For a shelter or hall, use Upgrade this form. Inspect the preview and save a second recipe when keeping both alternatives.

Different kinds of variation

Map seed changes procedural ground. Cave layout seed changes room placement and connections within a scheme, while structure seed changes its rock shaping. For included floating islands, a seed can select another complete mesh and vary a group's placement and size. It does not sculpt new geometry into an island source.

Settings

Map seed

Enter a whole number from 0 to 1000000000 and press Enter. With the same preset, seed and settings, Terra builds the same terrain again. A different seed changes the large landforms in procedural layers. Save the recipe when you find a layout you want to keep.

How to use it

Enter the seed and press Enter, then update the preview.

For example

Keep a seed you like, save the recipe and try a second copy with a new number.

A useful tip

Keep New variation on each creation off when matching the inspected preview.

New map variation

Picks another seed while keeping the preset type and your other settings. In procedural layers this gives a new arrangement of large terrain forms, not just different surface bumps. Check the preview, then create the map. You can type the previous seed to return to that variation.

Variation strength

Controls how far seed-based variations may move away from the base layout. Zero keeps the base composition; higher values let a new seed rearrange more of it. This works together with procedural layers. Keep the preset type, but try several seeds before changing all the shape settings.

New variation on each creation

Chooses a fresh seed each time you press Create. Use it when producing several variations in succession. The created map can differ from the preview shown before the click. Leave it off when you want to build exactly the variation you have just inspected, then save its recipe.

03 / Map dimensions

Decide how far the player can walk

Physical size and grid density are different decisions. Size tells you how much ground the level covers. The grid tells you how many points describe that ground. Height tells you how strongly it rises. Treat them separately and a small detailed arena does not accidentally turn into an enormous, sparsely described mountain.

IllustrationDecide how far the player can walk
  1. 01

    Set the real map dimensions in metres or kilometres. Think about travel time, sight lines and the area you actually intend to use.

  2. 02

    Choose a Landscape grid appropriate for the smallest ground features that matter. Read the vertex spacing summary after changing it.

  3. 03

    Set Relief height and Base elevation. The first changes the height differences; the second moves the entire terrain up or down.

  4. 04

    Check slopes and wireframe, then inspect the created native terrain from player height. More points can describe detail; they cannot invent detail that is absent from the height sources.

Set size before density

Choose the walking area with Map dimensions, from 250 metres to 64 kilometres. Next choose the grid and read the resulting vertex spacing. For example,100 ground intervals at 2 metres cover 200 metres. Increase density when smaller ground features need more points, while keeping the physical size you selected.

Height and base elevation

Relief height stretches the differences between low and high ground, often making the same hill steeper. Base elevation translates the terrain vertically without changing its shape. Water elevations and manually entered material bands are world heights, so revisit them when moving the terrain base.

Scale relief with the map

Enable this when a larger version should keep the same proportions. Resizing the world then scales relief height, smoothing distances and water level relative to the base. Disable it to preserve absolute heights while changing area. Changing only the grid density does not trigger this proportional scaling.

Choose a manual Landscape layout

Open Detailed Unreal layout when the project needs specific component counts. Set X and Y separately for a rectangular world, then choose sections per component and quads per section. Read the resulting dimensions and vertex spacing before creation. For an ordinary square map, begin with the standard Map dimensions and Landscape grid controls.

Inspect steep ground

Switch to Slope and Wireframe to see abrupt climbs. Use a denser grid for smaller bends, adjust Maximum ground slope when you need gentler terrain, and inspect the created ground at player height. Use the separate cave, grotto and tunnel tools for hollow spaces and overhangs.

Settings

Detailed Unreal layout

Opens the manual layout of Landscape components and sections. Use it when the project needs a particular Unreal grid arrangement. The standard grid choices are easier for ordinary map creation. After changing the layout, check the actual map size and vertex spacing so the intended scale stays clear.

Base elevation, m

Moves the entire terrain up or down in metres without changing its shape. Use it to place a valley below the world origin or align the land with another part of the level. Manually entered material heights and water levels remain world heights, so check them after moving the base.

Components along X

The number of large Landscape pieces across X. Each piece contains its own surface points and collision. Increasing this value while leaving spacing unchanged makes the map wider and heavier. For ordinary square maps, start with Map size and Grid; use this setting for a custom layout.

Components along Y

The number of large Landscape pieces along Y. It works like the X count, but changes the other side of the map. X and Y can differ to make a rectangular area. More pieces also mean more work for rendering, collision and world streaming.

Relief height, m

Controls how strongly the terrain stretches upward. Increasing it makes the same hills taller and slopes steeper; it does not move the whole map upward. If slope limiting is enabled, Terra may soften the result to stay within that limit. Compare the view from player height.

Landscape grid

Chooses how many points describe the ground. A denser grid can show smaller bends and gives terrain editing more room, but costs memory and processing time. The map keeps its size. Extra points do not invent detail missing from the original height shapes.

Map dimensions

Sets the real width and length of a square map, from 250 metres to 64 kilometres. This changes how far the player can travel, not just the number of surface points. Check the height-scaling option before resizing a map you already like.

Map origin X, m

Places the starting corner of the map along the world X direction, in metres. This moves the map sideways without resizing it or changing its relief. The value describes a corner, not the centre. Keep this in mind when fitting several terrain areas together.

Map origin Y, m

Places the starting corner of the map along the world Y direction, in metres. Together with X, it determines where the map begins in the level. It does not rotate the map or change the terrain pattern. Use matching edge positions when joining neighbouring areas.

Scale relief with map

Keeps the proportions of the landscape when you change its size in metres. With this enabled, doubling the width also scales the terrain height, smoothing distance and water level relative to the base. Disable it to keep absolute heights. Changing only grid density does not trigger this scaling.

Quads per section axis

Chooses 63 or 127 small ground squares along each side of a section. More squares give more points inside the same section, but increase the total grid and its cost. The resulting size also depends on spacing and component count; read the size summary before creating.

Sections per component axis

Splits each Landscape component into one section or four sections arranged 2×2. Sections let Unreal change distant terrain detail in smaller areas. They also affect the total point count. This is a layout setting, so check the resulting map dimensions after changing it.

Vertex spacing, m

Sets the horizontal distance between neighbouring ground points, in metres. With the point count unchanged, 100 intervals at 2 metres make a 200-metre map. On a slope, the inclined edge is longer because its ends have different heights. To add terrain detail while keeping the world size, choose a denser Landscape grid.

How to use it

Read spacing after choosing map dimensions and grid density.

For example

100 intervals at 2 metres make 200 metres of ground.

A useful tip

Choose more points when you want finer ground detail at the same physical size.

04 / World Partition

Your map. Your loading grid.

Terra uses Unreal's native World Partition system with the sizes and origin you choose. Physical Landscape blocks and runtime loading cells have separate jobs. The blue preview lines show the Landscape blocks; orange lines show the loading grid. One controls how the terrain is divided into actors, while the other controls the areas Unreal loads around a streaming source.

IllustrationYour map. Your loading grid.
  1. 01

    Choose Components per segment to group Landscape components into physical streaming proxies. A value of two groups them in blocks of two by two components.

  2. 02

    Choose whether loading cells contain a chosen number of those blocks or use a width entered directly in metres.

  3. 03

    Set the loading distance, grid name and origin. Keep the origin at the map corner, or give several terrain areas a deliberate shared origin.

  4. 04

    Turn on Landscape segments in the preview. Compare blue and orange boundaries, then create in a saved World Partition level.

Choose the Landscape block size

Set Components per segment to group components into Landscape blocks. A value of 2 groups them in areas of 2×2 components. Use smaller groups when you need finer loading units, or larger groups when broader blocks suit the level. Keep ground density under Landscape grid.

Set cells from blocks

Choose Group Landscape blocks, then set Blocks along one cell edge. With 250 metre blocks, a value of 2 makes 500 metre loading cells. Turn on Landscape segments and compare blue block boundaries with orange cell boundaries before creating.

Enter a cell width directly

Choose Set size in metres to enter the loading cell width and radius yourself. For example, use 400 metre cells with 250 metre Landscape blocks. Keep each cell wide enough to contain a whole block. If you need smaller cells, reduce Components per segment, then check the preview again.

Choose how far ahead to load

Set the radius around the player or another streaming source. For 500 metre cells, a radius of 2 cells means 1000 metres. Increase it when the scene needs more ground loaded ahead. Enable Wait for terrain on slow loading when movement should wait for required ground to arrive.

Align several terrain areas

Use the same grid name and origin when terrain areas should share loading settings. Give different grids distinct names when they need different sizes or origins. Leave Start grid at the map corner enabled for a simple layout, or turn it off and enter a shared Grid origin X/Y. Choose the block layout before creating each Landscape.

Settings

Components per segment

Groups Landscape components into physical streaming proxies. A value of 2 groups them in areas of 2×2 components. It does not change the landform or add polygons. Smaller groups allow finer loading; larger groups reduce the number of Landscape objects. The last row or column may be smaller.

Loading cell size

Choose Group Landscape blocks to keep whole numbers of physical blocks in each loading cell. Choose Set size in metres to enter the cell width and loading radius directly. These settings remain yours when you switch terrain presets; choosing another landform does not reset the grid.

Blocks along one cell edge

Choose how many Landscape blocks fit along one side of a loading cell. With 250 metre blocks,2 makes 500 metre cells. Turn on Landscape segments to compare blue blocks and orange cells before creation.

Cell width, m

Enter the square loading-cell width directly in metres. Keep it large enough to contain a whole Landscape block. For smaller cells, reduce Components per segment and check the preview again.

Loading radius, m

Sets the distance around a streaming source, such as the player, within which cells are loaded. It is independent of cell width. A larger radius keeps more terrain loaded and uses more memory.

Start grid at the map corner

Normally the loading grid starts at the map's starting X/Y corner. Turn this off to enter separate Grid origin X/Y coordinates, including negative values. Moving this grid does not move the map. The orange preview lines follow this origin. The cell count describes occupied Landscape cells; other actors assigned to the same grid can occupy additional cells.

Grid origin X, m

Sets the X coordinate of the loading grid's starting corner, in metres. Turn off Start grid at the map corner to edit it. Negative values are allowed. Use the same origin for terrain areas that should share loading-cell boundaries; this setting moves the grid, not the terrain.

Grid origin Y, m

Sets the Y coordinate of the loading grid's starting corner, in metres. It works with Grid origin X, m and does not rotate or resize the terrain. The orange preview lines show the resulting grid.

Loading radius in cells

Controls how far around a streaming source Unreal loads this grid. For 500 m cells, a value of 2 sets a 1,000 m loading radius. A larger radius keeps more terrain available and uses more memory. This is a streaming distance, not a change to the Landscape's visible detail.

Enable world streaming

Allows World Partition to load and unload spatially loaded actors. This is a world-wide setting. Disable it when the whole map should remain loaded. Terra still saves the grid and proxy layout.

Loading grid name

Give this loading grid a clear name using letters, digits and underscores, up to 48 characters. Use the same name for terrain areas sharing loading settings, or different names when they need their own cell size and origin.

Wait for terrain on slow loading

Enable this when movement should wait for required ground to finish loading. Use it with the selected loading radius and inspect the result with the player's travel speed.

Landscape segments

Shows blue boundaries between Landscape blocks and orange boundaries between runtime loading cells. Blue lines follow the terrain's starting corner. Orange lines follow the chosen loading-grid origin, which can be separate from the terrain. Use them to check block size, cell size and grid alignment before creating terrain.

05 / Terrain sources

Build the land from useful ingredients

The source stack combines height shapes before the Landscape is created. Use one broad form for the main terrain, then add sources for secondary ridges, basins or detail. This is a stack of ground shapes. The separate surface-material stack decides what covers that ground after its shape exists.

IllustrationBuild the land from useful ingredients
  1. 01

    Open Mix terrain sources and select the layer you want to edit. Add a source when the world needs another contribution rather than another copy of the same setting.

  2. 02

    Choose a height family and decide whether it should generate a new shape from the seed or use the library's saved shape.

  3. 03

    Set mixing mode and influence, then scale, rotate and offset the source until its important forms sit where you need them.

  4. 04

    Disable a layer to compare without losing its settings. Change its order with Up and Down, or remove it when it is no longer part of the recipe.

The order matters

Terra evaluates sources from top to bottom. Replace moves the existing result toward a new source. Add raises ground with positive influence and cuts it with negative influence. Multiply changes the relief already present; Minimum and Maximum keep the lower or higher surface. Reordering these operations can change the whole composition.

Move a source without moving the map

Layer rotation turns the height pattern around the map centre. Scale makes the pattern larger or smaller inside the same map boundary. Offsets are fractions of the map dimensions: an X shift of 0.1 moves the source by one tenth of the map width. World origin and actor placement are separate controls.

Import a height source

Select a terrain layer and choose Import terrain source. Pick a square 16-bit greyscale PNG or little-endian R16 image. Terra keeps a project copy for the layer. Position its features with scale, rotation and offsets, then set its blend mode and influence. Choose the map's physical size and height range in Map dimensions.

Keep experiments reversible

The enabled switch is useful for a quick comparison because it leaves a layer's source and settings in place. Removing deletes that layer from the recipe, not its source asset from the project. Keep at least one height source enabled, and save an interesting recipe before replacing half the stack.

Settings

Add layer

Adds another height source to the terrain mixture. Select its source and blending mode, then adjust its strength and position. The list order matters: each source changes the result left by the sources above it.

Mixing method

Chooses how this terrain source changes the result built by the layers above it. Replace moves the ground toward this source; Add raises or digs it, depending on the sign of strength. Multiply changes the existing relief, while Min and Max keep the lower or higher surface. Start with Replace for the main shape and add smaller details afterwards. Moving the layer changes the order of these operations.

Down

Moves this source one position in the mixing order. Terra processes the list from top to bottom, so changing the order can change the terrain, especially with Replace, Minimum and Maximum. Rebuild the preview to compare the result.

Layer enabled

Includes this source in the terrain calculation. Turn it off to compare the map without its contribution while keeping all its settings. Enable it again to return its effect. At least one terrain source must remain enabled.

Import terrain source

Add a square 16-bit grayscale PNG or little-endian R16 to the selected layer. A copy is stored in the project.

Height library

Chooses a terrain family for the selected source and enables generation from the map seed. You can scale, rotate and blend its hills or valleys with the other sources. Turn off procedural generation when you want the library’s saved height shape instead.

Mix terrain sources

Opens the terrain source stack. Each entry contributes a large form or added detail to the map and has its own mixing settings. Choose an entry to edit it, and use the up and down buttons to change evaluation order. This stack builds the shape of the ground; surface covering layers are edited in the material section.

Layer shift X

Moves this source along the map’s X direction before mixing. Values are fractions of the map width: 0.1 shifts it by one tenth. Use small changes to align a valley with another source. This moves the pattern inside the map, rather than moving the Landscape actor.

Layer shift Y

Moves this source along the map’s Y direction before mixing. Values are fractions of the map depth: 0.1 shifts it by one tenth. Combine X and Y offsets to choose which part of the source shapes the map. World origin and actor position are separate settings.

Generate new shapes from the seed

Builds a new height shape from the selected terrain family and map seed. Mountains remain mountains, but their ridges and valleys can move. Turn this off to use the library’s saved height shape. Imported height maps keep their own shape, so this switch is unavailable for them.

Remove

Removes the selected height source from the recipe. The other sources stay in their current order and the terrain is recalculated from them. To compare temporarily without deleting settings, disable the source instead.

Rotation, degrees

Rotates this source around the map centre, in degrees. Use it to turn a mountain chain or valley before mixing it with the other sources. Offsets move the source separately; the created Landscape actor keeps its own orientation.

Layer scale

Changes the size of this source inside the map. A larger value enlarges its hills and valleys; a smaller value fits a wider part of the source into the same map. It does not change the world size or grid spacing. Combine it with rotation and offsets to position the main forms.

Search and press Enter

Filters the visible list by the text you enter. Type part of a name to find the item, then select it to use it. Clearing the field shows the full list allowed by the current category. Searching does not change the map.

Select layer

Selects this terrain source for editing. Its blend mode, strength, scale, rotation and offsets appear below the source list. Selecting it alone does not replace the other sources or remove their contribution to the terrain.

Layer influence

Sets how much this terrain source contributes to the mixture. In Replace, Min, Max and Multiply, small values keep more of the previous layers. Add can also use a negative strength to cut into the ground. Change it together with the mixing mode and check the full terrain, because later layers can hide its effect.

Up

Moves this source one position in the mixing order. Terra processes the list from top to bottom, so changing the order can change the terrain, especially with Replace, Minimum and Maximum. Rebuild the preview to compare the result.

06 / Relief & weathering

Let the ground settle into itself

Weathering refines a terrain that already has a useful composition. Add small variation, shape drainage grooves, settle loose slopes or soften distracting roughness. These are terrain-building operations in the editor. They do not add running rivers, a live erosion simulation or a rainfall system to the finished game.

IllustrationLet the ground settle into itself
  1. 01

    Settle the main landform and height-source stack first. Open Fine shaping & weathering when the large hills and valleys make sense.

  2. 02

    Add a modest amount of Extra detail and set its frequency. Compare the full silhouette and a close view rather than judging only the busy texture of the preview.

  3. 03

    Use drainage, terraces, thermal passes and water-droplet erosion for the kinds of changes the terrain needs. Start gently so you can still recognise the source.

  4. 04

    Finish with a physical smoothing radius and a suitable maximum slope. Check both slope and wireframe displays before final creation.

Set the scale of the detail

Use Extra detail for small height variation and Detail frequency for its size. Higher frequency makes the features smaller. Use Relief contrast to separate high and low areas more strongly. Compare the outline and Slope view, then increase grid density when the small ground features need more points.

Shape channels and eroded slopes

Increase Drainage channels to carve branching downhill grooves. Use Water droplets for additional erosion and deposition along downhill paths. Begin with a light pass, compare the preview, and increase the amount when the slopes need more weathering. Add actual water separately in the Water tab.

Thermal settling

Stable slope is the angle above which loose ground starts moving. Thermal passes repeat the settling operation, while Ground movement controls how much material transfers during each pass. A lower stable angle or stronger transfer changes more ground. The three settings belong together; zero passes means the settling settings have no stage to act on.

Terraces

Terrace count divides the height range into steps, and Terrace influence blends those steps with the original smooth shape. At least two steps are needed to enable terracing. Fewer steps form broader shelves. More steps produce finer terraces, while a strong influence makes their risers more distinct and potentially steep.

Finish the ground shape

Set Relief smoothing radius in metres to soften small rough changes across a physical distance. Use a smaller radius to keep crisp rock forms and a larger one for broader softening. Choose Maximum ground slope for the climb you want, then inspect Slope and Wireframe together. The 89 degree setting leaves that slope guard off.

Settings

Fine shaping & weathering

Opens the finer terrain controls: added noise, contrast, terraces and erosion. First settle the large shape and scale, then use these controls to refine it. Several effects can soften or amplify each other, so change a few at a time and compare the preview. More erosion work also takes longer to calculate.

Relief contrast

Changes how strongly the low and high parts separate around the middle height. A higher value makes valleys lower and peaks higher; a lower value flattens their difference. It is useful after mixing sources, but strong contrast can create steeper slopes. Inspect the slope view and grid after a large change.

Drainage channels

Increase this to carve branching grooves along downhill paths. Use zero to keep the source without this shaping. Compare the preview while adjusting the amount, then add water separately in the Water tab when needed.

Water droplets

Sets the amount of water-droplet erosion work. Droplets travel downhill, remove material from some places and deposit it elsewhere, helping form drainage grooves. Zero turns off this erosion stage. Larger values take longer and can strongly alter smaller details, so test them after the main terrain shape is settled.

Maximum ground slope, °

Limits steep triangle slopes in the generated ground. 89 disables this guard. Separate structure meshes are unaffected.

Extra detail

Sets the strength of extra small-scale variation over the mixed terrain. It can break up overly smooth slopes. Start with a small value so the added detail supports the large form instead of hiding it. For a clean painted or anime world, lower values usually preserve the intended silhouette better.

Detail frequency

Sets the size of the added terrain detail. Higher values fit more changes across the map, making each feature smaller; lower values make broader undulations. Use it together with noise strength. Very fine detail needs a sufficiently dense grid to become actual ground geometry.

Relief smoothing radius, m

Softens small rough changes over this radius, in real metres. The physical size of the smoothing area stays consistent when you change grid resolution. A larger radius removes broader detail as well as tiny bumps, so compare the silhouette and slope view. Use a smaller radius when preserving sharp terrain features matters.

How to use it

Start with a small physical radius and compare the outline and slope view.

For example

Use a narrower radius to keep rocky edges and a wider radius to soften broader bumps.

A useful tip

Judge the created ground from player height too.

Stable slope, degrees

This is the slope angle above which loose ground starts to slide during settling. Lower angles let more slopes move and spread their material farther. Higher angles preserve steeper sides. It affects thermal settling, so use a nonzero pass count to see the result.

Terrace influence

Blends the stepped result with the original smooth ground. Near zero the original slopes dominate; higher values make shelves and risers clearer. Set the terrace count to 2 or more first. After increasing the amount, inspect steep risers in slope and wireframe views.

Terrace count

Divides the continuous height range into steps. Fewer steps make broad shelves; more steps create finer terraces. Set at least 2 steps to enable terracing; 0 or 1 leaves the heights continuous. Adjust the count together with terrace amount to control how clearly the steps appear.

Thermal passes

Sets how many times loose ground is allowed to settle downhill. More passes soften sharp crests and fill nearby low spots. The talus angle controls where movement starts, and transfer rate controls its strength per pass. Too many passes can smooth away small forms, so compare with the unweathered result.

Ground movement

Controls how much loose material moves during each settling pass. A low value makes gradual changes; a high one reshapes unstable slopes faster. It works together with the pass count and talus angle. Start gently if you want to keep crisp rocky forms while softening only their loose edges.

07 / Main landforms

Shape coasts, peaks and the places between

The Main shape builds a broad foundation under the source mixture. Choose an island, coast, ridge, canyon or another large form, then use influence, size and direction to bring it into your map. Free mixture leaves the sources to do the shaping. The terrain seed varies the outline without turning every family into the same central hill.

IllustrationShape coasts, peaks and the places between
  1. 01

    Choose the landform in Relief and variation. Match the foundation to the main job of the level rather than trying to persuade a coast preset to become a crater with tiny adjustments.

  2. 02

    Set Shape size relative to the map and use Shape direction for the coastline, ridge spine or caldera opening.

  3. 03

    Adjust Shape influence to keep more or less of the foundation alongside the source stack. Inspect the complete result because later shaping can soften a crater or narrow a gap.

  4. 04

    For water-shaped landforms, enable water and set an elevation and depth that fit the ground's available height range before generating.

Mountains, ridges, valleys and badlands

Current mountain and ridge foundations use unequal connected summits, saddles and side ridges. Valley sources have broad continuous floors with smaller side valleys joining them. Badlands use closer ridges and gullies with shallow ledges. Source layers still shape shoulders and foothills, so changing their mixture can make the same foundation feel very different.

Plateaus and impact craters

Plateaus have broad summits with uneven faces, ledges and a sloping foot. Impact craters cut a low interior into surrounding ground, with irregular inner terraces and smaller nearby impacts. The seed changes the outline and gullies. Adjust width and influence while watching whether other height layers fill features you intended to keep open.

Choose the volcanic profile

Choose Volcanoes for a cone with a summit crater and downhill gullies. Use Shield volcano for broad gentle flanks, Breached caldera for a collapsed summit open through one side, or Cinder cone for a smaller steep form. Adjust Shape size, Height and Shape direction, then try another seed for a different outline.

Set the submerged ground

Enable water before generating Archipelago, Lake Basin or Atoll. Set its elevation and depth: Archipelago uses them for gaps between islands, Lake Basin for its bed, and Atoll for the reef and lagoon passes. Keep the requested bed within the chosen ground height range. Review the shoreline before creating.

Build a cove with a grotto

Choose Cove and adjust its size, direction and seed to form the inlet and shelf. Set water between the basin and surrounding shore. In Caves and structures, choose Grotto, select a suitable headland as terrain context and connect its entrance. Place the floor above water for a dry grotto or below it for a sea grotto.

Settings

Main shape

Chooses the large landform beneath your source mixture, such as an island, coast, ridge or canyon. The height sources add detail to that shape. Free mixture uses the sources on their own. Adjust the landform’s strength, size and direction to turn a preset into your own layout.

Shape direction

Turns the main landform in degrees: for example, the direction of a coast, canyon or ridge. It changes the large shape underneath the source mixture. To rotate only one height source, use that source’s Rotation setting instead.

Shape size

Sets how wide the main landform is relative to the map. Use it to make a broader peninsula, a wider canyon or a larger central island. It works inside the existing map boundary; physical map size is set separately in the scale section.

Shape influence

Blends the main landform with your height-source mixture. Zero keeps the mixture alone; one fully applies the chosen landform while retaining detail from the sources. Intermediate values soften the landform’s influence. With Free mixture selected, choose the shape through the sources instead.

Edge falloff

Lowers the edges of the terrain toward the surrounding low ground. Use it to give an island a softer approach to the water instead of a high square border. Check the chosen water elevation together with the edge shape; this setting does not create a water surface.

08 / Landscape material

Give the ground its surface

The material builder connects a complete Unreal surface from matching texture inputs. Use Terra's twenty original 2048 × 2048 sets or choose your own project textures. Tint, normal strength, texture size and visual style let one useful set serve several worlds. These controls change how the ground looks under light; the terrain silhouette remains geometry's job.

IllustrationGive the ground its surface
  1. 01

    Choose the material source: Terra's texture-set builder, ready materials assigned by elevation, or a complete custom project material.

  2. 02

    For a generated surface, choose Automatic rules, Elevation bands or the five-role Reference model. Then select the needed coverings and their jobs.

  3. 03

    Choose matching colour, normal and surface maps. Set real-world texture size, layer tint and visual style, then inspect a close view and a wide view.

  4. 04

    Use Build and assign to selected Landscape to update existing ground, or let creation assign the material to new terrain. Save All so the shared material assets are saved with the level.

Pick an included covering

Enable Use included texture set and choose the surface you need: soil, ground covering, sand, loose stones, mud, clay, rock, snow, ice or a stylized set. Adjust its tint to match the world palette. Choose its placement role separately, so the same rock set can work on a cliff, cave wall or an island body.

What each map contributes

Base Color supplies colour without painted scene shadows. Normal changes the way fine bumps catch light. Roughness controls whether reflections look sharp or broad. Ambient occlusion adds small crevice shading, and Metallic marks actual metal. A height map guides fine material boundaries. None of these inputs creates solid pebbles, collision or a new cliff outline.

Packed maps

For custom ORM, red is occlusion, green is roughness and blue is metallic. Terra's generated packed maps also keep height in alpha. Colour uses sRGB; normals and packed data use linear values. If a custom set stores its maps separately, enable the packing option and provide roughness; occlusion and metallic can use their neutral defaults.

Style without another texture collection

Realistic keeps finer colour grain and normals. Stylized softens small detail while retaining broader colour variation. Anime calms the surface further with weaker fine normals. Automatic follows an animated preset where appropriate. A layer tint changes colour independently of normals, roughness and height, so a cooler rock does not suddenly become a different shape.

Change one Landscape's surface

Select the intended Landscape, restore its generation settings when needed, and adjust its material choices in Terra. Use Build and assign to selected Landscape to apply them. For a local adjustment in Content Browser, open that Landscape's material instance. Finish with Save All so its supporting assets are saved too.

Use a project material

Choose a complete material in Existing material path when you want that material to cover the ground. Use Materials by height to assign ready project materials to separate elevation ranges. Clear the complete-material selection when returning to Terra's texture-set builder, then build and assign the result to the selected Landscape.

Soil

Neutral earth for exposed ground and paths.

Grass

A ground-cover surface texture. It does not place grass geometry.

Rock

General weathered rock for cliffs and cave walls.

Snow

Light snow cover for high or cold ground.

Sand

Fine sandy ground for dunes, shores and dry basins.

Stones

Small loose stones for rough ground and transitions.

Mud

Soft, uneven ground for damp areas.

Clay

Fine, compact earth with shallow surface detail.

Limestone

Pale layered stone for cliffs, grottoes and cave walls.

Granite

Granular rock for harder exposed surfaces.

Sandstone

Layered sedimentary rock for dry cliffs and canyons.

Basalt

Dark rock for volcanic terrain.

Obsidian

Dark glassy-looking stone; adjust roughness for the intended lighting.

Ash

Fine volcanic ground cover.

Salt

Pale crusted ground for dry flats.

Ice

Frozen surface shading; it does not create transparent ice volumes.

Lava crust

Cooled volcanic crust. It does not simulate flowing lava.

Alien mineral

Mineral surface for unfamiliar worlds and tinted palettes.

Stylized ground

Simplified ground detail for stylized and animated worlds.

Stylized rock

Simplified rock detail for stylized terrain and caves.

Settings

Add material band

Adds another assignment of a project material to a height band, up to eight. Choose the material and its lower, upper and transition heights. Review neighbouring bands so that the full terrain height range is covered.

Band material

Choose the project material for this elevation band. Set its lower and upper heights and transition width, then build and assign the surface to the intended Landscape.

Maximum height, m

Sets the upper edge of this covering’s height range, in world metres. Above it, the covering fades out over the transition distance. Changing it moves a material boundary without changing the terrain geometry. Review the overlap with the next covering.

Minimum height, m

Sets the lower edge of this covering’s height range, in world metres. Below it, the covering fades out over the transition distance. Keep the lower edge below the upper one and check neighbouring ranges so the ground has continuous coverage.

Create terrain material

Create a textured four-layer Landscape material and paint weights in the level. An assigned custom material takes priority.

Crevice shading · optional

Choose a grey image that adds ambient shading inside cracks and recesses. Dark parts receive less ambient light; white parts keep it. It complements the scene lights and their shadows. With separate surface maps enabled, Terra puts this image into the red ORM channel. Leave it empty to add no extra cavity shading.

Add layer

Adds another surface covering to this material, up to eight. Choose its texture set, tint and placement after adding it. A new layer needs its own role or height range so that it appears where you intend. Adding a layer switches off automatic layer counting, keeping your chosen layers in the material.

Build and assign to selected Landscape

Select the Landscape you want to update, check the material settings and press this action. Inspect the covering in the level and use Save All to keep the level and surface assets together.

Base Color

The surface colour without lighting painted into it: soil colour, grass blades or rock markings. Choose the colour texture from the same set as the normal and roughness maps. Deep shadows or bright reflections baked into this image can look wrong when the sun moves.

Height (optional)

Tells the blend which small parts stand higher: stones, cracks, soil or snow. This helps one surface settle into the gaps of another. It does not raise the ground or add polygons. Use a matching height map; the included sets already carry this information in their packed texture.

Layer name

Give this covering a name you can recognise, such as dark basalt or pale clay. The name identifies its group of settings and helps when revisiting a recipe. Renaming does not change its texture, tint or position on the ground. Those are separate settings below.

Layer texture scale

Changes the texture size only for this layer. It multiplies the common texture size: a common 4 metres with layer scale 0.5 gives a 2-metre repeat. Use it to keep grass fine while rock stays larger. Compare both surfaces where they meet.

Metallic · optional

Use this image only where the surface is actually metallic. Ordinary soil, stone, snow and ice normally use black, meaning nonmetallic. White marks metal. It does not control wetness or shine; use roughness for those. With separate maps, Terra packs it into the blue ORM channel. An empty field uses a nonmetallic surface.

Material source

Choose how the ground gets its material. The builder combines texture sets and connects the finished material for you. The external-material mode uses materials already in your project. Choose one workflow first, then adjust its settings; controls belonging to the other mode are hidden.

Normal

Makes small bumps and grooves catch light as though they had depth. It changes shading, so a pebble here does not become a solid obstacle and the outer silhouette stays the same. Use a tangent-space normal map; keep it matched to the colour image. Terra prepares a linear normal copy when needed.

Normal strength

Makes the small lighting bumps flatter or stronger. Zero removes the normal-map detail; one uses its usual strength. Raising it does not add real depth or collision. If the surface looks crumpled or oily under side lighting, lower this value and check the roughness map too.

ORM: AO / Roughness / Metallic

One image holds three surface properties: red is crevice darkening, green is roughness and blue is metallic response. Use a packed ORM map with that exact channel order. For ordinary soil, grass, stone and snow, metallic should be zero. Choose separate maps if your set is arranged differently.

Remove layer

Removes this covering from the editable recipe. The remaining coverings are blended again, so the appearance of nearby boundaries can change. Texture files in the project are kept. To change a material already assigned in the level, apply the updated recipe.

Roughness

This grey image controls the sharpness of reflections. Dark values make a smoother, shinier surface; light values make reflections broader and duller. Use it to distinguish damp mud from dry stone without painting highlights into the colour image. It is required when separate surface maps are enabled and is packed into the green ORM channel.

Pack separate maps into ORM

Use this when roughness, crevice shading and metallic are supplied as separate images. Terra combines them into one ORM texture for the created material. Roughness is required. Crevice shading and metallic may be left empty: their defaults are no extra darkening and a nonmetallic surface.

Use included texture set

Uses a surface from Terra’s own texture library for this layer. Colour, normal and surface properties are connected together automatically. Turn it off to supply your own project textures in the fields below. This changes the texture source; placement and tint remain separate controls.

Included surface

Choose one of the twenty owned surfaces: soil, gravel, different rocks, snow, ice or painted coverings. Each set includes matching height detail and derived surface maps. Most bases are neutral so that tint can give the same set different colours. This choice sets the surface detail; the placement control decides where it grows across the terrain.

Layer tint

Multiplies this layer’s colour by the selected tint. White keeps its current colour; darker tints darken it. The neutral included textures accept many palettes, while the world palette supplies their starting colours. Normals, texture height, roughness and metalness remain independent, so recolouring does not change the shape of the highlights or the blend boundary.

Colors & custom material

Open these controls to set the world palette or select a complete project material. Use the palette swatches for the overall mood, then layer tints for individual coverings. Choose a complete project material when you want to use its appearance on the ground.

Materials by height

Opens the assignment of ready project materials to elevation bands. Choose the material for each band, its height limits and transition width, then apply the recipe. For texture sets from Terra’s own library, use the surface builder, where colour, normal and surface-property maps are connected together.

Existing material path

Choose the ready project material you want to use for the terrain. Inspect it on the selected Landscape, then apply it. Clear this selection when you want the Terra surface builder to provide the covering instead.

Create Terra starter materials

Create four original PBR materials in the project: soil, grass, rock and snow. Uses included textures and three-axis world projection, then assigns them to height bands.

World palette

Sets the starting colours of soil, grass cover, rock and snow. Click a colour swatch to change it; the neutral texture keeps its grain and relief under the new tint. Use this for the overall world mood, then use a layer tint for finer adjustments. Colour changes do not alter terrain heights or normal directions.

Remove this band

Removes the selected material assignment from the recipe. The material asset itself stays in the project. Check the remaining bands after removal and apply the recipe to update the material on an existing Landscape.

Surface detail

Adjusts fine colour variation and normal strength within the chosen style. 1 uses that style’s intended detail; 0 leaves a calmer average colour and the geometric surface normal. Values above 1 strengthen detail. It changes shading only: it cannot add cracks or rock silhouettes to the mesh. Check close views and distant slopes before increasing it.

Surface style

Uses the same owned texture set with different amounts of fine detail. Realistic keeps the full grain and normals. Stylized softens small detail and keeps larger colour variation. Anime makes surfaces calmer with weaker fine normals. The automatic choice follows an animated world preset; other presets start realistic. You can override it and recolour the world without new texture files.

Texture tile, metres

The real-world width covered by one texture repeat, in metres. At 4 metres, a stone in the image becomes much larger than at 1 metre. Layer scale multiplies this value: 4×0.5 gives 2 metres. Check at player height, especially where cliffs meet flat ground.

How to use it

Set the common texture size, then adjust each layer's multiplier.

For example

4 metres ×0.5 layer scale gives a 2 metre repeat.

A useful tip

Check the size of stones where a cliff meets flat ground.

09 / Placement & blending

Make the coverings meet like neighbours

Surface placement decides where a covering belongs; blending decides how it meets the next one. Terra uses the same boundary for colour, normals and surface properties, so a patch of soil does not keep the old rock's shine underneath its new colour. Texture height lets raised details remain visible while another surface fills the lower parts.

IllustrationMake the coverings meet like neighbours
  1. 01

    For Automatic rules, assign jobs such as base ground, gentler covering, cliff, upper covering or a height range. Texture choice and placement job are separate decisions.

  2. 02

    For Elevation bands, set lower and upper world heights and a transition width, or fit the bands to the measured terrain. Review the overlaps between neighbours.

  3. 03

    Set Height Blend and inspect an actual material boundary near player height. Keep enough broad transition for the small height detail to work inside it.

  4. 04

    Choose Hex, Stochastic or Texture Bombing anti-tiling, then compare nearby detail and distant repetition. Adjust rotation and sharpness for the selected coverings.

Automatic rules

The base sits underneath the other coverings. Gentler ground can receive a softer covering, steep faces expose rock, and an upper surface begins near its height threshold. Ridges can also expose stone. Uneven masks break up their shared edges rather than drawing unrelated random islands across flat ground. Rock slope controls coverage, not the actual slope of the terrain.

Elevation bands

Every band uses its lower and upper boundary. Neighbouring ranges share coverage where they overlap; the lowest covering also fills heights outside the other ranges. A band that reaches a measured terrain extreme stays covered at that outer edge. Entered heights are world elevations, so revisit them after moving the terrain base or changing its range.

Work with five surface roles

Choose the Reference model and keep one covering for each of its five roles, including loose stone. Select the textures and tint for each role, then adjust its texture scale, normal strength and height blend. Review close and distant views, particularly where cliffs meet softer ground or upper cover.

Broad boundaries and fine edges

Transition width supplies the broad space in which two surfaces meet. Height Blend lets matching texture heights shape the finer border within that space. Colour, normals, occlusion, roughness and metallic follow the same mixture. A stronger height influence can preserve stone tips, but an excessive value can make an edge look speckled rather than natural.

Three ways to reduce repetition

Hex blends neighbouring texture copies across a hexagonal arrangement. Stochastic varies samples while compensating for the contrast lost in blending. Texture Bombing mixes shifted copies using their height detail. Rotation controls how much copies turn, and Blend sharpness controls the boundary between copies. Those settings are separate from the soil-to-rock transition width.

Choose the active coverings

Leave Determine active layer count enabled to fit the chosen surface palette to the measured ground. A short steep map can still use rock, and low ground can keep an upper covering. Turn it off when every chosen layer should take part, up to eight. Keep all five roles when using the Reference model.

Set a believable texture size

Set Texture tile in metres, then use Layer texture scale for each covering. A common 4 metre tile and a layer scale of 0.5 give a 2 metre repeat. Inspect at player height and where cliffs meet flat ground. Adjust size first, then use anti-tiling and rotation to make repetitions less noticeable.

Settings

Fit bands to terrain height

In the builder, places material boundaries using the actual height distribution after updating the preview. In external-material bands, divides the chosen relief range into equal height bands. Turn it off to enter world heights yourself. After changing terrain height, recheck where grass, rock and snow appear.

Transition width, m

Sets the height distance over which neighbouring coverings meet, in metres. A wider transition gives their height detail more space to mix; a narrow one produces a sharper boundary. Inspect it close to the ground as well as from above. This changes shading, without adding terrain triangles.

Antitiling method

Choose Hex to blend neighbouring texture copies, Stochastic to vary samples while keeping detail contrast, or Texture Bombing to mix shifted copies with height detail. Compare a close surface and a distant slope, then adjust rotation and sharpness for the chosen textures.

Determine active layer count

Leave this enabled to fit the chosen surface palette to the measured ground. A short steep map can still use rock, and low relief can keep an upper covering. Turn it off when all chosen layers should take part, up to eight. Keep all five surface roles when using the Reference model.

Texture height influence

How strongly the small texture heights affect the border between materials. At zero the border follows the broad coverage mask. Increasing it lets raised details show through and fills lower spots first. Inspect close up; a strong setting can make the edge look speckled.

Random rotation

Controls how much texture copies may turn to hide repetition. A low value keeps visible layers and grooves pointing roughly the same way. A high value varies their direction more strongly. Colour, normal and surface-data maps turn together; inspect rock strata before choosing a large value.

Blend sharpness

Controls the border between overlapping texture copies in the antitiling method. Lower values soften that border but can wash out small details. Higher values keep details clearer and can make patch edges easier to notice. This is separate from the width of a soil-to-rock material transition.

Rock slope, degrees

Sets the slope angle where exposed rock starts to replace gentler ground, in degrees. Lower values expose rock on more hillsides; higher values reserve it for steeper faces. Natural variation softens and breaks up the boundary. This controls material coverage, not the steepness of the terrain itself.

Upper surface threshold

Sets the relative elevation where the upper covering begins, from zero to one across the terrain height range. A lower value brings it farther down the slopes; a higher value keeps it nearer the summits. The upper covering can be snow, ice, salt or another selected surface. Its actual colour follows the recipe palette and layer tint.

Surface placement

Choose how the layers cover the terrain. Automatic rules place ground, patches, cliffs and upper cover by slope and height. Elevation bands use the height ranges of your layers. The reference model uses five roles, adding loose stone between cliffs and softer ground. All modes use your selected textures.

Where this layer appears

Choose the layer’s job separately from its texture. The base covers the ground, patches break it up, cliffs follow steep slopes, and the upper coating appears above the snow line with uneven edges. Height range follows this layer’s height limits. These roles work in automatic surface distribution; height-band distribution follows the ranges for every layer. For example, sandstone can cover cliffs while clay forms patches.

10 / Caves & structures

Give the world an inside

Landscape can form a hill but cannot contain a hollow room. Terra adds caves, grottoes, shelters, through tunnels, halls and underground networks as separate static-mesh forms. Choose the type, dimensions and rock character, inspect its real interior, then place it against suitable terrain or use manual coordinates for a standalone structure.

IllustrationGive the world an inside
  1. 01

    Select a Terra Landscape or read the intended terrain context, then open Caves and structures. Choose the kind of space you need.

  2. 02

    Set its entrance width and clear height, length, shell thickness and shape settings. For a network, choose a plan and allow enough footprint for its rooms and ramps.

  3. 03

    Inspect Surface, Clay, cutaway and Passage plan as appropriate. Check the floor, headroom and narrow connections rather than accepting the outside silhouette alone.

  4. 04

    Choose names and an output folder, then Add to the level. When a passage through Landscape is required, use the entrance connection described in the next section.

Choose the space you need

Use Shelter for a shallow refuge, Grotto for a broader chamber, Tunnel for a through route and Underground hall for a large room. Choose Cave or Grotto for the full route-scheme selector. Floating islands have their own complete-mesh shape and size controls in the same tab.

Opening dimensions and interior space

Width and Height describe the clear entrance. Shell thickness is added outside it, and interior chambers can be wider or taller. Length is the extent along the entrance direction, not the sum of all passage lengths. Keep character height, turning room and slope limits in mind when changing proportions.

Rock shape and surface detail

Rock irregularity moves the actual surface into bulges and recesses. Passage bend breaks a direct line of sight, while profile changes the cross-section: oval, canyon, keyhole and low gallery shapes have different usable space. These are geometry controls. Material normal strength and roughness change lighting, not the clear space inside.

Choose the surface detail

Start with the broad chamber and passage shapes, then adjust Surface cell size. Smaller cells describe finer rock; larger cells keep the build lighter. Give thin walls enough detail to stay complete. Inspect the cutaway and the passage at player height before choosing the final value.

Materials for walls and floor

Choose the rock covering and the upward-facing ground covering independently. From landscape can carry the corresponding surfaces and tint into a form, along with texture scale, anti-tiling, normal strength and height-aware blending. A cave floor takes the base covering rather than the landscape's gentle-cover layer. Custom assigned materials keep their own graphs.

Edit a placed form

Select a Terra structure and choose Read selected structure / position to recover its saved settings. Adjust the preview, then Rebuild selected structure to apply the changes. Use the dedicated move workflow for a connected cave entrance. Save the level and generated assets after checking the result.

Settings

Add to the level

Create the shown structure in the current level. Bound caves also connect their entrance when enabled.

Names and asset folder

Sets the structure name and the project folder for new meshes and materials. Give important structures recognisable names before creating several copies. Use a folder inside the Unreal project, beginning with /Game/. Save both the level and its new assets after creating or rebuilding.

Detailed shape settings

Opens controls for wall thickness, rock unevenness, bending, descent and entrance reach. Underground networks also show surface detail and extra connections. Change one value at a time and compare a section view. Smaller surface steps can take much longer to build.

Landscape source and existing structures

Use these actions when working with something already in the level. You can read the selected terrain or structure, rebuild a Terra structure, move its entrance or attach a new passage to an existing exit. Check the selected object before applying an action; selection determines what will change.

Passage profile

Change interior cross-section: oval tube, narrow canyon, keyhole or low lava-like gallery. Entrance dimensions remain fixed for joining. This is a shape model, not a geological simulation.

Materials

Choose the rock material, the ground material used at the entrance and the width of their shared transition. Start with the supplied defaults to check placement and geometry. You can refine the appearance afterwards without changing the planned route through the cave.

Maximum passage descent, °

Limit automatic downward tilt of the whole cave. A smaller value requires a steeper natural hillside.

Manual world coordinates

Opens manual position and rotation. Turn off terrain binding to place a standalone structure by coordinates; floating islands already use manual placement. A connected cave needs the dedicated move action so its opening follows it. Check the preview before applying coordinates.

Read selected structure / position

Reads settings from a Terra structure selected in the level. If the selected object is another kind of actor, it reads its position instead. This loads values into the panel without rebuilding the level object. Check the loaded type and dimensions before applying an update.

Passage bend

Bends the passage along its length instead of keeping it straight. Increase it to break a long direct line of sight; lower it for a clearer route. The entrance keeps the contour needed for joining. Check that the bent body stays underground at the chosen location.

Surface cell size, m

Choose the detail of the generated structure surface. Smaller cells describe finer rock; larger cells keep the build lighter. Start with the broad shape, then inspect the cutaway and player-sized passage while adjusting detail.

Cave ground surface

Choose soil, gravel or another owned surface for the floor. It covers the flatter upward-facing parts and blends with the rock through irregular, height-aware edges. From landscape takes its base covering and tint; it does not use the grass-patch layer. The same rule works in grottoes, tunnels, shelters, halls and underground networks.

Height, m

Clear entrance height from floor to ceiling, in metres. The outer shell adds wall thickness; ceilings inside can rise higher. For floating islands this limits the height of the box the whole mesh fits into. Scaling stays uniform to preserve the original proportions, so the actual height can be smaller.

Structure type

Choose what to build: a single cave, grotto, shallow shelter, through tunnel, hall, connected underground world or floating island. Changing the type also supplies suitable starting dimensions. Inspect the preview before adding it. Caves are separate structures placed onto terrain; landscape presets do not automatically dig them.

Length, m

Depth of a cave or passage, in metres. In an underground world it controls the extent along the entrance direction, not the total length of all passages. For a floating island it is the length limit of the box the whole mesh fits into. Island scaling stays uniform, so the actual length can be smaller.

Rock material

Assign your material, or leave empty to use the Terra rock material. World-projected textures work best on rebuilt geometry.

New structure variation

Picks a new structure seed and refreshes the preview. Cave rock details change. Floating islands can select another ready mesh when Choose by seed is active, and group spacing and sizes can vary. The cave-layout seed stays the same. Use Create or Update to apply the result to the level.

Pitch, °

Tilts the structure’s forward direction upward or downward. This turns the whole body, including its floor and ceiling. Use small changes and inspect a lengthwise cutaway. Terrain-bound placement normally calculates this tilt from the ground and its allowed descent.

Roll, °

Leans the structure sideways around its forward axis. This can tilt the floor across the passage, so check whether the character can still stand and walk there. Use it for deliberate placement adjustments. It is separate from turning the entrance left or right.

Rock irregularity

Changes the actual unevenness of the rock surface. Low values make broad, smoother walls; high values add stronger bulges and recesses. This can change the mesh and passage shape. It is different from material roughness, which controls reflections. Check the floor and headroom after large changes.

Section height, local m

Cutaway keeps geometry below this height measured from the entrance floor. Lower it to inspect deeper levels. This display control does not change the saved mesh.

Structure seed

For caves, this seed changes rock irregularities; the room plan has a separate layout seed. For floating islands, Choose by seed selects a ready mesh from your list, and the group seed also varies spacing and size. It does not reshape the source mesh. Save the whole recipe to repeat the result.

Add to selected passage exit

Creates a new passage at the selected passage’s exit, matching its opening and rotation. The new actor is attached to the selected actor.

Generated surface style

Uses the same owned texture set with different amounts of fine detail. Realistic keeps the full grain and normals. Stylized softens small detail and keeps larger colour variation. Anime makes surfaces calmer with weaker fine normals. The automatic choice follows an animated world preset; other presets start realistic. You can override it and recolour the world without new texture files. The generated covering also takes texture size, antitiling and Detail from the terrain. Wall and floor layers keep their own scale, normal strength and Height Blend. Applying a terrain material refreshes Terra-generated connected entrance coverings without rebuilding their meshes.

Rock surface

Choose the surface of cave walls and ceilings, or the rock body of a floating island. From landscape takes its cliff surface when you build. Choose the cave floor separately. Any of the twenty owned surfaces is available; visual style is a separate setting. Choosing a surface clears the custom material field so the generated material can be used.

Rebuild selected structure

Rebuilds the selected Terra structure in place. Connected entrances keep their opening, length and wall thickness. Save the level and generated assets afterwards.

Upgrade this form

Use this to refresh an older shelter or hall. Inspect the updated preview, including ledges, ceiling shapes and floor clearance, then rebuild the selected structure when ready. Save a second recipe when keeping the earlier form.

Wall thickness, m

Set the rock shell thickness around the clear interior, in metres. Inspect the cutaway after changing it, particularly at narrow passages and nearby rooms.

Width, m

Clear entrance width in metres, measured across the passage. Wall thickness is added outside this opening; inner chambers can be wider. For floating islands this limits the width of the box the whole mesh fits into. Scaling stays uniform to preserve the original proportions, so the actual width can be smaller.

World X, m

The structure’s position along world X, in metres. Enter coordinates for manual placement or floating islands. A cave bound to terrain gets its position from the placement controls instead. To move a connected entrance, use Edit selected cave so its old ground opening is handled too.

World Y, m

The structure’s position along world Y, in metres. Enter coordinates for manual placement or floating islands. A cave bound to terrain gets its position from the placement controls instead. To move a connected entrance, use Edit selected cave so its old ground opening is handled too.

Yaw, °

Turns the whole structure left or right around the vertical axis. Zero faces world +X; 90 degrees faces +Y. For terrain-bound caves, switch off automatic turning to set the entrance heading yourself. The position and dimensions stay the same.

World Z, m

The structure’s position along world Z, in metres. Enter coordinates for manual placement or floating islands. A cave bound to terrain gets its position from the placement controls instead. To move a connected entrance, use Edit selected cave so its old ground opening is handled too.

11 / Routes, rooms & seeds

Thirty schemes. More than thirty caves.

A cave scheme describes the idea of the route: a winding stream, branching halls, linked rings, fractures or several storeys. Layout seed changes its arrangement while Layout variation controls how far it can depart from the base plan. Structure seed shapes the rock separately, so you can improve the walls without asking the whole route to move house.

IllustrationThirty schemes. More than thirty caves.
  1. 01

    Choose Cave or Grotto, then select one of the thirty Network layout schemes. Read its plan description and starting room, storey and circuit counts.

  2. 02

    Change Cave layout seed or use New passage layout. Keep Layout variation above zero when you want room positions, proportions and passage widths to differ.

  3. 03

    Adjust Chambers, Underground levels and Extra connections together with the overall footprint. A multi-storey route needs enough length for a usable connecting ramp.

  4. 04

    Inspect Passage plan, then the actual cutaway at each level. The plan is a route guide; nearby physical passages can meet and create additional intersections.

Set rooms and alternate routes

Choose Chambers for the planned rooms, then Extra connections for bypass routes. A ring starts with one circuit; a figure eight starts with two. Keep the selected scheme's required counts and add enough space when increasing rooms. Compare the route plan with the actual cutaway to see where passages meet.

Several storeys

Underground levels divides the planned rooms between floors. Sloping passages connect them, so taller or wider forms can need more length for the transition. Change Section height to inspect a different storey. Look at the ramps in the actual mesh and test them with the character and movement settings your project uses.

Use both seeds deliberately

Layout seed changes room positions and routes within the selected scheme. Structure seed changes rock unevenness. Layout variation at zero fixes the scheme across layout seeds; at one it allows the largest deviations. Neither setting adds rooms or changes the requested circuit count. Save the complete structure recipe to reproduce both route and rock.

Read the room before adding more rooms

Chamber spacing spreads the planned network but does not widen its corridors. More rooms in the same small footprint can merge into larger spaces. Increase the surrounding terrain coverage and review its cutaway when expanding a network. The complete scheme catalogue below explains each starting route.

Winding stream passage

One winding route with uneven chambers along a former stream bed. Starts with 8 rooms on 1 level and no loops. You can change these settings; the layout seed changes their arrangement.

Stream tributaries

A main gallery receives side passages that branch again before ending. Starts with 10 rooms on 1 level and no loops. You can change these settings; the layout seed changes their arrangement.

Braided galleries

Two winding galleries join at several crossings, leaving alternative routes. Starts with 10 rooms on 1 level and 2 loops. You can change these settings; the layout seed changes their arrangement.

Spreading delta

Passages spread forward from the entrance chamber toward a widening fan of ends. Starts with 10 rooms on 1 level and no loops. You can change these settings; the layout seed changes their arrangement.

Canyon bends

A single route alternates broad left and right bends between chambers. Starts with 8 rooms on 1 level and no loops. You can change these settings; the layout seed changes their arrangement.

Chamber chain

Large and smaller halls alternate along one winding route, joined by narrower necks. Starts with 8 rooms on 1 level and no loops. You can change these settings; the layout seed changes their arrangement.

Chamber clusters

Three connected hub chambers lead to their own groups of side rooms. Starts with 9 rooms on 1 level and no loops. You can change these settings; the layout seed changes their arrangement.

Twin hall groups

Two hub halls share a connection and each serves a separate group of side chambers. Starts with 10 rooms on 1 level and no loops. You can change these settings; the layout seed changes their arrangement.

Central hub

A larger central hall has passages radiating around it in several directions. Starts with 8 rooms on 1 level and no loops. You can change these settings; the layout seed changes their arrangement.

Offset halls

The main route swings between offset chambers instead of following a straight axis. Starts with 8 rooms on 1 level and no loops. You can change these settings; the layout seed changes their arrangement.

Single circuit

Rooms form one closed circuit. The entrance joins the circuit at its first chamber. Starts with 8 rooms on 1 level and 1 loop. You can change these settings; the layout seed changes their arrangement.

Figure eight

Two closed routes share a central junction chamber. Starts with 9 rooms on 1 level and 2 loops. You can change these settings; the layout seed changes their arrangement.

Linked rings

Two separate closed circuits are linked by a passage between their chambers. Starts with 10 rooms on 1 level and 2 loops. You can change these settings; the layout seed changes their arrangement.

Ladder galleries

Two parallel galleries have end connections and a middle rung, giving two circuits. Starts with 10 rooms on 1 level and 2 loops. You can change these settings; the layout seed changes their arrangement.

Spiral circuit

A route curls outward around an inner area and returns by a closing connection. Starts with 9 rooms on 1 level and 1 loop. You can change these settings; the layout seed changes their arrangement.

Joint grid

Chambers follow a joint grid, with angular galleries and an added bypass. Starts with 9 rooms on 1 level and 1 loop. You can change these settings; the layout seed changes their arrangement.

Oblique joints

An oblique fracture pattern offsets the rows of chambers and their angular connections. Starts with 9 rooms on 1 level and 1 loop. You can change these settings; the layout seed changes their arrangement.

Crossing rifts

Four rift arms extend from a central junction, with chambers along each arm. Starts with 9 rooms on 1 level and no loops. You can change these settings; the layout seed changes their arrangement.

Parallel rifts

Paired rift galleries meet a shared spine; an extra connection makes an alternate route. Starts with 10 rooms on 1 level and 1 loop. You can change these settings; the layout seed changes their arrangement.

Staggered rifts

Offset rows of chambers connect through branching passages and an extra route around. Starts with 10 rooms on 1 level and 1 loop. You can change these settings; the layout seed changes their arrangement.

Paired branches

Successive paired forks create a branching route with several separate ends. Starts with 8 rooms on 1 level and no loops. You can change these settings; the layout seed changes their arrangement.

Comb gallery

A continuous trunk has short side chambers on one side, like teeth of a comb. Starts with 10 rooms on 1 level and no loops. You can change these settings; the layout seed changes their arrangement.

Three-way forks

Three-way forks split the route into broad groups of ending passages. Starts with 10 rooms on 1 level and no loops. You can change these settings; the layout seed changes their arrangement.

Fan of passages

A single entrance hub opens into a forward-facing fan of long passages. Starts with 9 rooms on 1 level and no loops. You can change these settings; the layout seed changes their arrangement.

Uneven side branches

An offset main route has side branches of changing length and direction. Starts with 10 rooms on 1 level and no loops. You can change these settings; the layout seed changes their arrangement.

Descending stream

A winding chain of chambers gradually descends below the entrance floor. Starts with 8 rooms on 1 level and no loops. You can change these settings; the layout seed changes their arrangement.

Ascending gallery

A winding chain of chambers climbs gradually above the entrance floor. Starts with 8 rooms on 1 level and no loops. You can change these settings; the layout seed changes their arrangement.

Terraced chambers

Chambers step down through terraces on several storeys, linked by sloping routes. Starts with 10 rooms on 2 levels and no loops. You can change these settings; the layout seed changes their arrangement.

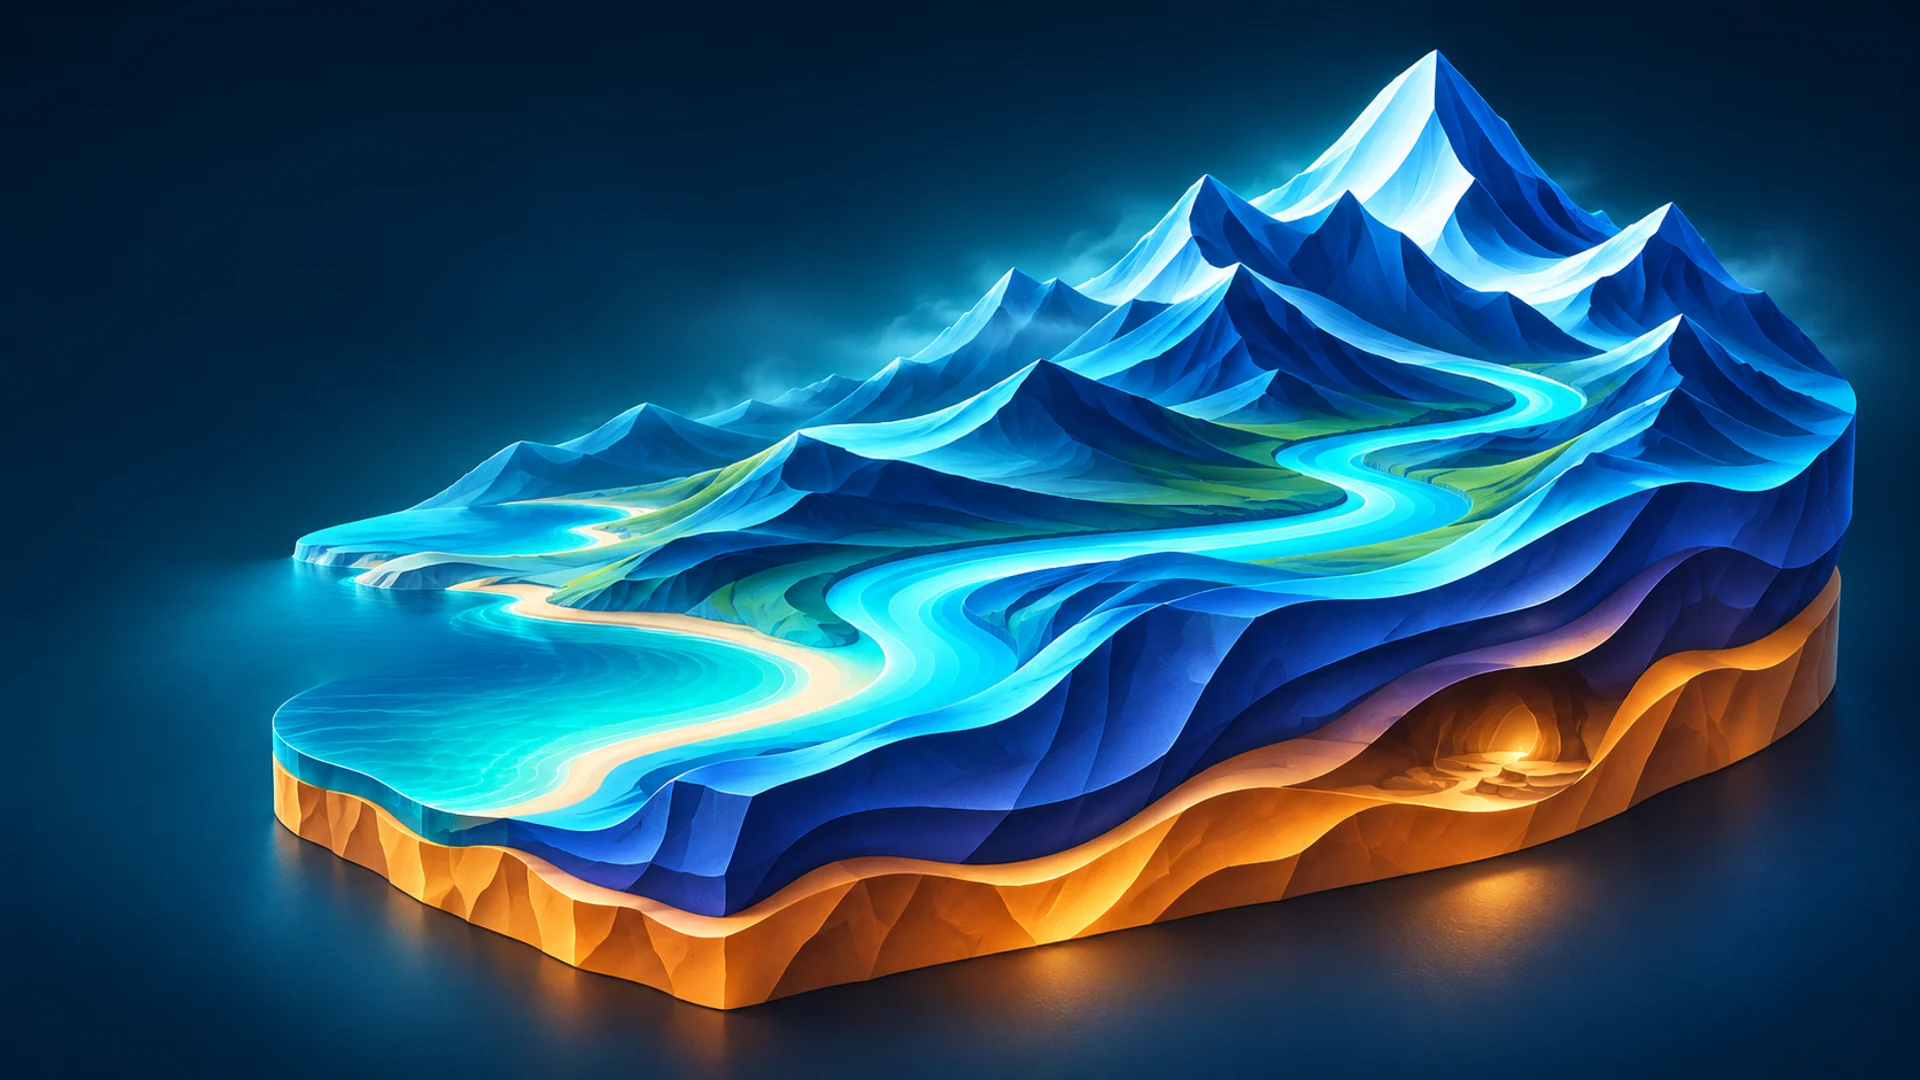
Stacked circuits

Each storey has a closed circuit; a longer sloping connection links the floors. Starts with 12 rooms on 2 levels and 2 loops. You can change these settings; the layout seed changes their arrangement.

Switchback descent

A route makes repeated side-to-side turns, then continues on a lower storey. Starts with 10 rooms on 2 levels and no loops. You can change these settings; the layout seed changes their arrangement.
Settings

Network layout

Choose a route scheme, then review its starting chamber, storey and extra-connection counts. Use the full thirty-scheme selector for Cave or Grotto, or choose a branching, circuit or fracture pattern for an underground network. Adjust the size and seeds, then inspect Passage plan and cutaway.

Passage plan

Show the room layout and actual passage paths without rock or landscape hiding them. Colours distinguish upper and lower paths.

Cave layout seed

Change this seed to try another arrangement inside the same cave scheme. Keep the desired room, storey and circuit counts, and set Layout variation above zero. Use Structure seed for the rock shape and save the full recipe to keep both choices.

Layout variation

How much the layout seed can move rooms and vary their proportions and passage widths within the chosen scheme. Zero keeps the scheme fixed across layout seeds; one allows the largest deviations. The same seed and settings reproduce the same cave. This does not add rooms or change the requested number of circuits.

How to use it

Set a value above zero, then change Cave layout seed.

For example

Keep a ring scheme while trying different chamber positions and passage widths.

A useful tip

Use Structure seed when changing the rock shape instead.

Underground levels

Number of storeys used by the route scheme. Some schemes require at least two. Storeys are linked by sloping passages, so a taller or wider cave needs more length for the connection. Add enough rooms for every storey and check the cutaway at each floor.

Extra connections

Add bypass routes between the planned rooms. Start with the count supplied by the scheme: one circuit for a ring, two for a figure eight. Keep enough room and footprint for the connections, then inspect both Passage plan and the actual cutaway.

New passage layout

Picks another layout seed and refreshes the room plan and connections. In caves and grottoes, set Layout variation above zero to let the plan change. Room count, storeys, dimensions and rock seed stay as entered. Inspect the plan before creating or updating the structure.

Chambers

Number of planned chambers in the cave, grotto or underground network. The chosen scheme has a minimum count, and the rooms are divided between storeys. Increase the footprint when adding many rooms so chambers and connecting passages have space. The plan shows planned rooms; nearby spaces can meet in the actual rock.

Chamber spacing, m

Sets the intended distance between rooms, in metres. A larger value spreads the network across more ground and can lengthen connecting passages. It does not widen those passages. Inspect the plan and make sure the surrounding terrain is large enough to cover the whole network.

Use the new cave schemes

Use this when an older cave recipe should try the current route schemes. Inspect its new preview and plan, then update the selected structure when the result suits the level. Save a second recipe to keep the earlier alternative.

Network layout

Choose a route scheme, then review its starting chamber, storey and extra-connection counts. Use the full thirty-scheme selector for Cave or Grotto, or choose a branching, circuit or fracture pattern for an underground network. Adjust the size and seeds, then inspect Passage plan and cutaway.

12 / Entrances & placement

Connect the inside to the outside

A cave actor placed against a hillside is still behind that hillside until the ground is opened and joined. Terra's connection fits the mouth to the selected Landscape, creates a shared transition and updates visibility and collision together. It needs suitable coverage and proportions. Preview the entrance as a player would approach it, then apply the connection.

IllustrationConnect the inside to the outside
  1. 01

    Use the actual selected Landscape as context for a connection in the level. Read selected Landscape refreshes a loaded region around the structure after terrain edits.

  2. 02

    Find another suitable place or choose a location in the preview. Adjust the across/along percentages, heading and entrance depth while checking that the chamber remains covered.

  3. 03

    Enable Cut and connect the entrance when adding, or connect a selected existing Terra entrance. Check the opening, the material transition and player-sized clearance.

  4. 04

    To move a connected cave, use Move selected cave and Apply the new position. Save the changed level and generated assets after inspecting the new connection.

Binding and direction

Terrain binding reads the height and tilt from the selected ground rather than raw world coordinates. Automatic facing turns the cave toward rising terrain. Turn it off for your own heading; maximum passage descent limits the allowed tilt. A standalone structure can use manual coordinates, but a connected entrance should be moved through Terra's move action.

Depth and reach

Entrance below ground lowers the floor slightly to help it meet the terrain and is limited to 45% of the opening height. Connection reach describes how far the opening volume extends in front of the floor pivot. It does not enlarge the width or height. Too much burial can make a sensible chamber produce a very uninviting front door.

A frame from project meshes

No entrance rocks are selected by default. Optional arrangements use ten rocks or fourteen rubble pieces from the meshes you choose in your project. Terra preserves their vertices, UVs, normals and LODs, scales them uniformly and gives their generated copies its material. Frame source LOD0 geometry is limited to 30,000 triangles per entrance.

Edit the dressing afterwards

Frame pieces are separate editable actors, so you can adjust a particular rock in the level. Reconnecting recreates the arrangement, so make final manual placement changes after the last connection operation. Choose complete lightweight stones with sensible undersides, and check that larger frame scale does not narrow the usable opening.

Inspect the whole join

Use Focus entrance to inspect the floor, shoulders and surrounding ground together. Check the approach from player height and from inside. Adjust entrance dimensions, terrain placement and material-transition width until the connection fits. Save the level after connecting or moving it.

Deleting, moving and undoing

The dedicated move action restores the old opening before connecting the new placement. Deleting a connected form restores its stored Landscape cut and removes its owned frame pieces. Undo brings the connection and frame back; Redo removes them again. Visibility and physical collision update together, including on Landscapes with Edit Layers. Inspect the result before saving.

Settings

Across the area, %

Places the entrance across the selected terrain area, from 0% at its left edge to 100% at its right edge. Ground height is recalculated at the new position. Leave enough room around the point for the full chamber and its entrance. For a cave already in the level, apply the move after checking the preview.

Along the area, %

Places the entrance along the selected terrain area, from 0% at its near edge to 100% at its far edge. The fitting process checks the ground height and whether the chamber can stay inside the hill. Combine this with the across position and heading to choose an entrance, then apply the result.

Apply the new position

Rebuilds the selected structure with the current dimensions, moves it and reconnects its entrance. One Undo reverses the operation.

Cut and connect the entrance when adding

Enable this to open the Landscape and connect the cave mouth when adding the form. Choose terrain with enough coverage around the doorway and chamber. Inspect the entrance at player height, then save the level and assets.

Face into the slope automatically

Points the cave into the rising terrain using the local slope. Turn it off to choose the heading yourself. This controls horizontal direction; the separate maximum pitch still limits how far the cave can tilt into the hill during fitting.

Keep entrance bound to the ground

Calculate height and tilt from the terrain instead of raw world coordinates. Floating islands ignore this option.

Move selected cave

Reads the stored recipe and position from the Terra cave selected in the level. Adjust its placement in preview, then use Apply the new position to rebuild the connected entrance. That action restores the old ground opening and prepares the new one. Simply editing the preview does not move the level actor.

Entrance below ground, m

Lowers the entrance floor below the terrain, in metres. A small depth helps the ground meet the floor; too much can bury the opening. Terra limits it to 45% of the entrance height. Check the opening from the entrance view after changing this value.

Find another suitable place

Search the shown terrain for a dry entrance with the cave body underground. Each click tries another candidate.

Direction into the cave, °

Sets the horizontal direction from the entrance into the cave, in degrees. Zero follows world +X and 90 follows +Y. This field is used when automatic turning into the slope is disabled. After turning, check that the chamber remains covered by the terrain.

Finish choosing a place

Stops choosing a cave position by clicking the terrain preview. The structure keeps its last preview position. This button does not create the cave or apply a move in the level; use the creation or move action when the preview is ready.

Add entrance mesh

Adds another mesh slot to the entrance set. Select an existing rock or bank mesh in the new slot; the generated pieces can then use it alongside the other shapes. An empty slot must be filled or removed before generation.

Use draft terrain

Uses the terrain currently described in Terra’s settings as the context for placing a structure. This lets you plan the entrance while preparing a world. For a connection in an existing level, choose its actual Landscape as the context so fitting uses the level’s real heights and transform.

Entrance rocks

Places ten or fourteen existing rock meshes around the connected entrance and assigns Terra material to every material slot. Each piece is a separate actor that you can move or rotate in the level. The source geometry is kept intact. Reconnecting recreates the arrangement, so make final manual adjustments afterwards. Choose irregular blocks or a broken stone rim, or leave the entrance without added rocks.

Focus entrance

Frames the structure’s entrance in the preview at its real dimensions. Use this view to judge opening height, ground contact and the rock shoulders around it. This changes the preview camera; apply the structure or its move separately when the placement is ready.

Entrance mesh

Selects an existing Static Mesh from your project. The first slot supplies the broad cap above the entrance; the other slots supply the sides. Terra places the original mesh with rotation and uniform scale, then overrides all material slots with its own material. Vertices, triangles, normals, UVs and source assets remain unchanged. Choose lightweight boulders with enough volume to cover the rim. Their back and underside should also be complete, so the arch looks solid from inside the cave.

Rock size

Changes each rock’s size equally along all three axes, preserving its original proportions. One is the usual size for this entrance. Larger rocks cover more of the edge and can narrow the opening, so inspect the preview and check the passage after changing the value. You can adjust individual actors in the level afterwards.

Connect selected entrance to Landscape

Connects the selected Terra entrance to a Landscape: it opens the ground and builds the shared transition surface. First place and select the structure, then check its terrain context. Review the doorway and collision afterwards. The operation belongs to the editor’s Undo history.

Ground material for the seam

An optional ground material for the entrance transition. Leave it empty to use the material found on the Landscape. Supply your own when matching an existing custom surface. Inspect colour, texture size and lighting on both sides of the join after connecting.

Read selected Landscape

Select the Landscape or one of its blocks in the level, then read the ground around the structure. Press again after sculpting so the entrance preview uses the updated terrain.

Entrance connection reach, m

How far the matching opening volume extends in front of the entrance floor pivot. It does not enlarge the entrance width or height.

Remove last mesh

Removes the last slot from the entrance set. It changes the recipe, without deleting the asset from your project. Keep at least one valid mesh when entrance dressing is enabled; reconnect to rebuild existing pieces from the changed set.

Entrance material transition, m

Sets the blend width on each side of the welded entrance, in metres. Terrain and cave coverings mix on the same connected surface, including colour, normals and surface properties. A larger value spreads the transition farther; inspect it together with the entrance outcrops. It does not set the wall thickness.

Choose a place in preview

Switch to the top view and click the terrain. Height is recalculated from the clicked surface.

13 / Floating islands

Let some of the ground live upstairs

Terra includes eight complete floating-island meshes with its own surface material. Choose a named shape or let the seed choose from your source list. Place one island or a group of up to twenty-four. Whole meshes are scaled uniformly and retain their proportions; Terra does not turn them into a new stack of cones or reshape their source geometry.

IllustrationLet some of the ground live upstairs
  1. 01

    Choose Floating islands and select a whole shape, or use Choose by seed. The eight supplied source rows work without installing another mesh pack.

  2. 02

    Set the length, width and height envelope, then position the island in world coordinates. Uniform scale fits the whole mesh inside the requested envelope.

  3. 03

    For a group, set the number of islands and group radius. Try a seed for a different selection, spacing and size variation, then inspect from above, beside and below.

  4. 04

    Choose rock and top coverings, create the group and save its assets. To edit an existing island, read its saved structure settings and rebuild that selected actor.

The supplied geometry

Every supplied shape contains 19,800 triangles at LOD0, followed by 9,900, 4,950 and 2,474 triangles at its three lighter LODs. Twenty-four supplied islands total 475,200 LOD0 triangles before distance-based detail changes. Each placed island is a separate static-mesh actor. Its location marks the centre of its footprint at the lowest point.

Use your own whole mesh

Replace a source row with a complete project mesh when you need another island shape. A named shape uses its corresponding row; Choose by seed can use every listed row, so fill or remove empty rows. Source paths are saved in the recipe. If a source moves to another project path, select its new location before rebuilding.

Choose a suitable custom source

Use a whole island mesh with up to 20,000 triangles for ordinary placement. A particularly large complex shape can use up to 30,000. Keep a group within 480,000 and check its displayed total. Choose lightweight source assets with suitable LODs and collision, then inspect their silhouettes at the intended camera distance.

Apply the island covering

Choose the rock-body and top coverings before creation. Terra gives the generated island its selected material on every slot while keeping the source mesh available. Use the tint, normal strength, height blend and texture-scale controls to match the world. Save the generated assets with the level.

What a seed changes

For Choose by seed, a new seed can select another source mesh. In a group it also changes the distribution and size variation. It does not add rock detail to a source mesh or Boolean several meshes together. Change the source itself when you need a different silhouette, then inspect the result at its intended viewing distance.

Updating older islands

A level keeps the generated meshes it already references after a plugin update. To use a newer supplied source, select the island, read its settings, choose the intended source and rebuild it. A group consists of separate actors, so edit one island at a time. Save the generated assets and the level, then check the reopened result.

Settings

Number of floating islands

Create 1–24 independent closed islands. Each is a separate Static Mesh actor when placed in the level.

Island size and shape

Set the space the island should fit inside. Terra scales the whole mesh evenly, so a narrow or shallow shape can occupy less than one of the requested dimensions. Its proportions stay the same.

Island shape

Choose a complete island shape, or let the seed choose one from your list.

Island mesh

Choose a complete island mesh in each source row. A named shape uses its matching row; Choose by seed selects from the filled list. Start with the eight included meshes or select your own lightweight sources. Set the size envelope, rock and top coverings, then inspect the preview from above, beside and below. Keep source assets available at their selected project paths when loading the recipe again.

Add island mesh

Adds one more row to the source list, up to eight rows. Assign a complete mesh to the new row before using it. Adding a row does not create a new island actor. Choose by seed can select from every listed source; selecting a named shape uses its corresponding row.

Remove last island mesh

Removes the last row from the source list. It does not delete that mesh from your project or remove already placed actors. Check the selected shape after shortening the list.

Existing islands and source changes

Select a placed Terra island, read its structure settings and choose the source you want to use. Choose Rebuild selected structure, inspect the shape and coverings, then save the generated assets and level. Work on one island actor at a time.

Group radius, m

Distance from the group centre to the outer island centres. Choose enough space to prevent overlaps.

How to use it

Set the distance from the group centre to the outer island centres.

For example

Increase the radius when the selected island sizes need more separation.

A useful tip

Inspect the group from above and below before creating.

Island top surface

Choose the covering on the upper part of a floating island. It blends into the rock body through irregular boundaries and the surfaces’ height detail. From landscape uses its patch layer, or its base if there is no patch layer. This adds a surface material only; it does not place grass meshes, trees or other plants.

14 / Water

Put water at the right height

Terra can create native Unreal Water without an external water product. It also offers an optional provider connection for another compatible plugin. Water elevation is a world height, depth is a positive distance, and the terrain remains a separately editable object. Choose the system you intend to use and inspect how it meets the actual low ground.

IllustrationPut water at the right height
  1. 01

    Open Water and choose Unreal Water, Automatic selection or the required registered provider. Enable Show and create water for the terrain you are preparing.

  2. 02

    Set the surface elevation in world metres and the depth. Compare them with Base elevation and the measured ground range.

  3. 03

    For native Unreal Water, use the collision-setup action when WaterBodyCollision is missing. Save the changed project configuration along with your project.

  4. 04

    Create and inspect the water in the level. With a compatible linked-water provider selected, use Update linked water after sculpting and check the shore again.

Create native Unreal Water

Choose Unreal Water, set elevation and depth, then enable Show and create water. Terra adds a native lake surface and water zone across the map. Inspect it in the created level and use Unreal's water tools for later adjustments. Shape the terrain bed before creation or sculpt it afterwards when needed.

Change the shore or bed

Set water elevation and depth before generating an Archipelago, Lake Basin or Atoll. When editing an existing Landscape, use the water settings to adjust its water and sculpt the ground separately when the bed should change. For a fresh generated variation, restore the recipe, revise the settings and create the new terrain.

Choose the water system

Select Unreal Water for the built-in system. Choose Automatic when Terra should use the available connected provider, or select your installed external provider explicitly. Check the provider name shown in the panel before creation, then set the surface elevation and depth for the intended terrain.

Refresh linked water after sculpting

When using a compatible linked-water provider, select its Landscape and choose Update linked water after editing the ground. Check the updated shore in the level. Use Remove linked water to remove that linked water, and Unreal Undo when you want to return to the previous accepted state.

Prepare an external water workflow

Enable the external water plugin and its Terra connection, then select it in Water. Load the Landscape area before updating linked water, and use an unrotated Landscape with positive scale for that workflow. Keep real floor geometry beneath openings where the water connection needs ground depth.

Return to a saved water setup

Open the project with the water system used for that Landscape, select the terrain and read its water settings. Use that provider's update controls for its linked water. Choose Unreal Water when preparing a new terrain with the native system, then inspect and save the result.

Settings

Set up Unreal water collision

Use this action when preparing native Unreal Water in a project. It adds the water-collision setup the project needs. Save the project settings after running it, then create and inspect your water.

Show and create water

Enable water for this terrain, choose the system, elevation and depth, then create. Inspect its surface and shoreline in the level. Use that water system's editing tools for further adjustments.

Water depth, m

Enter the water depth in metres. For new Archipelago, Lake Basin and Atoll terrain, set it before generation to shape submerged ground. For an existing Landscape, adjust its water and sculpt the bed separately when needed. Keep the bed within the chosen ground height range.

Water elevation, metres

Sets the water surface elevation in world metres. Compare it with the terrain’s base elevation and relief: the same water height can flood one recipe and leave another dry. Terra passes this level to the selected water system after creating the ground.

Water provider

Check the water provider shown here before creation. Choose the system used by your project, then set the surface elevation and depth. Use the same provider when returning to its saved linked water.

Water system

Choose Unreal Water for the built-in system, Automatic for the available connected provider, or your installed external water system. Check the provider name shown before creating, then set elevation and depth.

Update linked water

Select the Landscape with linked water and use this after editing the ground. Load the terrain area, run the update and inspect the shore, then save the level. Use the water provider installed for that saved link.

Remove linked water

Select the Landscape with linked water and use this to remove its water. Use Unreal Undo to return to the previous state, or update the link later when you want to create its water again.

15 / Preview & inspection

Look before you build

The preview is the workbench for decisions. Turn the world, inspect its outline, read its slopes and look inside a cave before creating final objects. Preview quality keeps that process manageable. Final Landscape creation uses the full grid selected under Map dimensions, so a quick preview is a guide to composition rather than the last word on close-up geometry.

IllustrationLook before you build
  1. 01

    Use Auto preview while making light changes. Turn it off when entering several values or using expensive erosion, then press Update preview once the set of changes is ready.

  2. 02

    Choose 513, 1025 or 2017 preview points along the longer side. Start lighter for layout decisions and increase quality when inspecting smaller ground forms.

  3. 03

    Compare Surface with Clay, Height, Slope and Wireframe. Switch 2D / 3D for plan and angled views, and turn on Landscape segments for block and loading-grid boundaries.

  4. 04

    For underground forms, inspect cutaway and Passage plan and adjust Section height for another level. Use Focus entrance to examine the actual mouth dimensions.

Compare the useful views

Start with Surface for the overall look. Switch to Clay for the outline, Height for low and high areas, Slope for climbs and Wireframe for the surface layout. For an entrance, use a player-sized close view. Finish with a look at the actual created level before saving your preferred result.

Framing and navigation

Frame preview brings the terrain or complete island group back into view after camera movement. Island presets frame the group once their preview is ready. Focus entrance frames a structure's doorway. These actions move only the preview camera; they do not move a placed actor or apply a pending change in the level.

Look inside a structure

Use Passage plan to read the room arrangement, then switch to cutaway to inspect the actual chambers and passages. Change Section height to reach another floor. Look around narrow turns and ramps from several angles so the clear space suits the character you intend to use.

Pause a calculation

Press Cancel when you want to stop the current preview calculation. Wait for it to finish stopping, then change the settings and Update preview. Keep the recipe if you want to return to that setup later, and wait for the new preview to be ready before choosing the result to create.

Settings

Auto preview

Recalculates the preview after you change settings. It is convenient while shaping the map; turn it off when making many changes or using expensive erosion. You can then press Preview when ready. The preview does not create the final Landscape in the level.

Surface

Shows the surface with its current material and lighting. Use it for the overall look, then compare clay and wireframe to separate colour from geometry. The lightweight preview uses fewer ground points than the final Landscape, so inspect the created level before accepting close-up detail.

Cancel

Press this to stop the current calculation. Wait for it to finish stopping, then change the settings and update the preview when ready. Save a useful recipe when you want to return to that setup.

Clay

Shows a plain neutral surface so you can judge silhouettes, dents, entrances and larger rock shapes without texture colour. Surface normal maps are not a substitute for those geometric forms. Compare from player height and an overview.

Structure section

Show a horizontal section of an underground world at the chosen height. Single caves use a lengthwise section. Only the preview is cut; the saved mesh stays complete.

Display

Choose what to inspect in the preview: the material, heights, slopes or wireframe. Structures also offer a cutaway, except for floating islands. Passage plan is available for underground worlds and current cave and grotto recipes. Changing the view does not change the saved geometry.

Frame preview

Opening an island preset frames the whole group automatically once the preview is ready. Use Frame preview to show the whole terrain or island group again after zooming or moving the camera. It changes only the preview camera; objects in the level keep their position and size.

Height

Colours the preview by ground elevation. Use it to read peaks, lowlands and the height distribution before assigning surfaces or water. It is a diagnostic view and does not change the material that will be created.

Update preview

Calculates the current recipe and displays it in Terra’s preview. Use it after editing with automatic preview disabled. Check heights, slopes and grid before creating the Landscape. Saving the recipe keeps the settings used for this calculation.

Quality

Sets how many ground points the preview samples along its longer side: 513, 1025 or 2017. Use a lighter preview while adjusting large forms, then inspect fine slopes with more points. The created Landscape still uses the grid chosen in Map size and Grid.

Slope

Colours ground by steepness. Use it to spot abrupt height changes and decide where a rock surface should appear. Combine it with wireframe: a smooth colour change alone does not prove that triangle spacing or collision is correct.

Create Landscape

Give the Landscape a name and choose a project folder for its generated assets. The level must be saved and use World Partition. Create the terrain when the preview is ready, then save the level and new assets in Unreal. Save a Terra recipe as well if you want to reuse or change these settings later.

Water

Sets the water system, surface elevation and depth. Terra creates or connects the selected water provider after building the ground. These controls do not add vegetation or a sky system. Check that the water level suits the actual lowlands of your chosen map variant.

Map dimensions

Set the map dimensions, height range and Landscape grid before creating the world. A denser grid represents smaller shapes but costs more memory. Final creation uses the full requested grid in a saved World Partition level. Check the preview and save the recipe first so you can reproduce the result.

Relief and variation

Adjust the main silhouette, small relief and drainage channels. Expand mixing to use another height field.

Caves and structures

Add caves, grottoes, tunnels, underground networks or floating islands. Choose a type, adjust its settings and check the preview before placing it in the level. The instructions follow the chosen type: islands use their own shape and size controls; terrain-bound forms also need an entrance position.

Landscape material

Opens the ground covering settings: texture library, tint, surface placement and blending. Here you choose how soil, rock, snow and other coverings meet across the terrain. These settings change the material rather than the height of the ground. Check both a close view of the boundaries and the whole map.

World type

Choose a preset as the starting point for your world. Categories and search help find a suitable landform. Change the generation seed for another map from the same preset, then edit sources, dimensions and shaping settings. Saving the recipe keeps your chosen map settings instead of limiting you to the original example.

2D / 3D

Switches the preview between a top-down plan and an angled 3D view. The plan helps compare coastlines, valley routes and cave layouts. Switch back to judge slopes and height. This does not rotate the terrain or change its geometry.

Wireframe

Shows the actual triangles of the preview mesh. Look for long narrow faces, crowded patches and abrupt changes in density. Landscape keeps regular horizontal spacing; its edges become longer on a slope. Structure meshes use their own surface topology. Check final native meshes too, because preview density is lighter.

16 / Create Landscape

Create ordinary Unreal assets

When the preview is useful, Terra creates native Unreal objects rather than trapping the world inside its own viewer. Use a saved World Partition level, choose a recognisable Landscape name and a project output folder, then create at the full requested grid. Materials and enabled water are handled as part of the creation workflow.

IllustrationCreate ordinary Unreal assets
  1. 01

    Save the current World Partition level and check the preview, seed-change setting, dimensions and output name.

  2. 02

    Choose a Content Browser folder beginning with /Game/, such as /Game/MyWorld/Terra. This is an Unreal asset path, not a Windows drive path.

  3. 03

    Press Create in level and wait for the requested operation to complete. Inspect the resulting ground, materials and enabled water in the real level.

  4. 04

    Use Unreal Save All to save the level, generated assets and shared material resources. Keep a separate saved Terra recipe for the generation settings.

Find the created world

Look for the Landscape and its blocks in the level, and the generated meshes, materials and textures in your chosen Content Browser folder. Additional forms appear as separate actors. Use Unreal Save All after creation so the level and its supporting assets are saved together.

Save the world and its recipe

Use Save recipe to keep the generation choices. Use Unreal Save All to keep the level, generated meshes, materials and textures. Keep both when continuing later: the saved level holds your edited world, while the recipe restores the settings used to build a variation.

Keep editing in Unreal

Continue sculpting, painting and arranging the native result with Unreal's tools. Those manual edits belong to the level and assets. Terra does not reconstruct each brush stroke from the original recipe. Generating another variation creates a new Landscape; restoring generation settings is a separate read action.

Settings

Project asset folder

Sets the project folder for the generated meshes, materials and supporting assets. Use an Unreal content path beginning with /Game/, such as /Game/MyWorld/Terra. This is a Content Browser folder, rather than a Windows drive path.

Create in level

Calculates the final terrain at the full chosen grid and creates native Landscape assets in the current saved World Partition level. Its materials and enabled water integration are applied as part of creation. Review the preview and save the recipe first, then save the level and generated assets after creation.

Landscape name

Names the Landscape that will be created. Choose a name you can recognise in the level and in saved recipes. This field identifies your result; it does not change the generated heights.

17 / Save, restore & continue

Keep the decisions that made the world

Recipes make a promising result something you can return to. They store generation settings, seeds, layer order, surface choices and asset references. A created Terra Landscape also remembers the recipe used at creation. Recover it when you want to understand a map or make a variation, while keeping manual level work in its own saved assets.

IllustrationKeep the decisions that made the world
  1. 01

    Use Save recipe to write a portable JSON record of the current generation settings. Give useful variations names that explain their purpose.

  2. 02

    Use Load recipe to return those settings to the panel. Check referenced imported sources, textures and meshes when bringing a recipe into another project.

  3. 03

    To read a created terrain, select the Landscape or one of its streaming proxies and choose Restore generation settings in World type.

  4. 04

    For a new variation, adjust the restored recipe and choose a suitable new name, location or level before creating. Save manual sculpting and painting in the Unreal project as usual.

Restoring is a read operation

Restore generation settings retrieves the creation recipe stored on the selected Landscape. The existing terrain remains in place. It does not erase sculpting, repaint the world or rebuild water simply because you read its settings. Creation is an explicit later action and makes a new Landscape.

Keep your manual edits

Save sculpting, painting and actor changes in the Unreal level and assets. Keep the Terra recipe alongside that work. Use the saved level to continue hand editing, and load the recipe when you want to revisit the generation choices or prepare a new world variation.

Moving between projects

Recipes refer to imported height sources, custom textures, materials and source meshes by their content paths. Make those assets available at the recorded paths or reselect their new locations. Loading the JSON alone does not transfer them. The supplied plugin resources must be available when a recipe uses those resources.

Older worlds and upgrades

Earlier Terra maps may have no stored creation recipe; use their separately saved JSON. Older recipes retain their generator version. Explicit structure upgrades let you inspect the new preview before changing an old actor. Keep a second recipe when comparing old and new versions so a successful experiment does not erase the original decision.

Settings

Load recipe

Open Caves and structures before loading a saved structure recipe. Use another tab to load a Landscape recipe. Choose the saved file, check referenced textures, sources and meshes, then inspect the updated preview before creating or applying changes.

Save recipe

Open Caves and structures to save the current structure recipe, including its type, shape, layout, seeds, source meshes and coverings. From the other tabs, save the Landscape recipe with its map settings, sources and surfaces. Choose a clear filename, then save the Unreal level and assets separately.

Restore generation settings

Select a Terra Landscape or one of its blocks, then restore its creation settings to the panel. Review the seed, dimensions, sources and coverings before preparing a variation. Choose a new name, location or level when creating another Landscape.

18 / Help & useful habits

Keep the next step easy

Use the views and saved settings to make the next edit clear. Read the intended Landscape or structure, check the selected object and choose the action that matches the change. Keep a useful recipe and a saved level so returning to an earlier idea takes a few clicks.

IllustrationKeep the next step easy
  1. 01

    Choose the interface language at the top of the Terra window. Use Help to return to the guide for the control you are working with.

  2. 02

    After sculpting terrain, read the selected Landscape again before placing or moving a connected cave.

  3. 03

    Use Frame preview or Focus entrance to return to a useful camera view, then compare Surface with the relevant Clay, Slope or cutaway display.

  4. 04

    Save the recipe and use Unreal Save All after a result you want to keep. For help, send the engine version, selected action, settings and a clear image of the part you are working on.

Fit an entrance to the terrain

Read the actual Landscape, choose Find another suitable place or pick a point in the preview, then adjust heading, burial and dimensions. Use Focus entrance to inspect the opening. Apply the connection when the full chamber sits under suitable ground.

Apply the intended surface

Select the Landscape, restore its generation settings when needed and open Landscape material. Check the chosen material source and textures, let the preview finish, then use Build and assign to selected Landscape. Save All after applying the result.

Open a selected mesh in MeshWorks

When MeshWorks is installed and enabled, select the Terra cave and choose Open selected cave in MeshWorks. Choose the desired editing operation there, inspect the result and save it through that tool's controls.

Check a passage at player height

Inspect the entrance, floor, ceiling and ramps with the character size used in your project. Use the actual level for a walking check after creation. Return to the selected structure's settings to adjust width, height or placement, then inspect the updated result.

Ask for a useful answer

Include the engine version, selected tool, relevant settings and a clear screenshot. For a cave entrance, show its approach and terrain context. For a material, show the selected inputs and a close view of the boundary. Save the recipe so the same setup is easy to revisit.

Settings

Open the result in MeshWorks

Enable this when you want to continue editing the created cave in an installed MeshWorks plugin. After Terra creates or moves it, choose the desired operation in MeshWorks and inspect the result there.

MeshWorks (optional)

Use this connection when MeshWorks is installed and enabled. Select the generated cave, open it in MeshWorks and choose the editing operation you need. Inspect and save the result through that tool's controls.

Open selected cave in MeshWorks

Select the Terra cave, then open MeshWorks. Use its level-selection or Content Browser selection control to bring in the mesh and choose the operation you want.

Help

Opens the Terra help page at https://pautinka.digital/twaio/ in your web browser. The plugin also includes an English UserGuide.txt in its Documentation folder.

Language

Changes the language of Terra’s panel and explanations. Choose English, German, French, Italian, Spanish, Simplified Chinese or Russian. Recipe values and seeds remain the same when you change languages.

Questions & answers

A few things before the first mountain.

Which engine version should I choose?

Use Terra Works All In One for Unreal Engine 5.3–5.8. In Fab Library, choose Install to Engine and select the version used by your project. Repeat the installation for each supported engine version you work with.

How do I install Terra from Fab?

Acquire Terra on Fab, close Unreal Editor and find the plugin in the Epic Games Launcher's Fab Library. Choose Install to Engine and select the engine version. Open the project, enable Terra in Edit → Plugins and restart when requested. Then open Tools → Pautinka → Terra Works All In One.

How do I keep a world variation I like?

Keep its Map seed and use Save recipe. The saved recipe keeps the sources, settings and surfaces together. Leave New variation on each creation off when the created terrain should match the preview you have inspected. Save the Unreal level and assets too.

How do I get another map from the same preset?

Choose the preset and press New map variation. Compare a few seeds before changing its other settings. Adjust Variation strength when you want a closer family resemblance or a larger departure from the starting composition.

How do I continue sculpting a created world?

Select the created Landscape and use Unreal's sculpting and painting tools. Save the level and assets after the edits. Keep the Terra recipe when you also want to revisit the original generation choices or create another variation.

Where do I recover a Landscape's creation settings?

Select the Terra Landscape or one of its streaming proxies. In World type, choose Restore generation settings. Terra loads its creation recipe into the panel. Change the settings and choose a suitable new name, location or level when preparing another generated Landscape.

How do I make a larger map without choosing more points?

Increase Map dimensions while keeping the same Landscape grid. Read the new vertex spacing and check the slopes. Use Scale relief with map when the larger terrain should keep its proportions, or switch it off to keep the same absolute height.

How do I add more ground detail at the same size?

Keep Map dimensions unchanged and choose a denser Landscape grid. Then review the actual vertex spacing. Use the source and shaping controls to provide the detail you want, and inspect the created level from player height.

How do I choose my own loading cells?

In Map dimensions, choose cells grouped from Landscape blocks or Set size in metres. Enter the size, loading radius, grid name and origin. Turn on Landscape segments to compare the blue physical blocks with the orange loading cells before creation.

Where do I build overhangs and hollow spaces?

Open Caves and structures and choose a cave, grotto, shelter, tunnel or hall. Set its dimensions, inspect its cutaway and place it against suitable terrain. Use the entrance connection when it needs a passage through the Landscape.

How do I choose an anti-tiling method?

Start with Hex, Stochastic or Texture Bombing in Landscape material. Compare the nearby surface and a distant slope. Adjust Random rotation and Blend sharpness for the selected textures, then keep the method that gives the clearest natural variation for the chosen coverings.

How do I soften the edge between soil and stone?

Give the surfaces a useful transition width, then adjust Texture height influence so raised stone detail remains visible across the edge. Inspect colour, normal detail and reflections near player height. Keep the texture size believable on both sides of the boundary.

How do I use my own texture set?

Turn off Use included texture set for the layer. Choose its Base Color, tangent-space Normal and packed ORM. For separate surface maps, enable Pack separate maps into ORM and assign roughness plus the optional occlusion and metallic inputs. Add a matching height image when using texture-height blending.

How do I use a ready project material?

Select it in Existing material path for a complete covering, or use Materials by height to assign project materials to elevation bands. Set the band heights and transitions, then build and assign to the selected Landscape. Clear the complete-material selection when returning to the texture-set builder.

How do I change the world's colour style?

Start with World palette, then adjust the tint of individual layers. Choose Realistic, Stylized or Anime in Surface style and tune Surface detail. Compare a close view and the whole map before applying the result.

How do I choose the cave walls and floor?

In the structure's surface controls, choose Rock surface for walls and ceilings and Cave ground surface for upward-facing floor areas. Use From landscape to start from the terrain's corresponding covering. Adjust tint, normals and texture scale, then inspect their shared boundary.

How do I get a different cave from the same route idea?

Change Cave layout seed with Layout variation above zero, or press New passage layout. Keep the same scheme to retain the overall route idea. Use Structure seed when changing the rock shape instead. Save the whole structure recipe to keep both choices.

How do I add alternate routes in a cave?

Use Extra connections alongside Chambers and the chosen scheme. A ring starts with one circuit and a figure eight with two. Give the network enough space, then compare Passage plan with the real cutaway to inspect the resulting connections.

How do I open the hillside at a cave entrance?

Read the intended Landscape, choose a suitable slope and enable Cut and connect the entrance when adding. For an already placed Terra form, select it and use Connect selected entrance to Landscape. Inspect the doorway and approach at player height.

How do I move a connected cave?

Select its Terra actor and choose Move selected cave. Adjust the placement in the preview, then Apply the new position. This moves the entrance connection with the structure. Inspect the new opening and save the level and assets.

How do I add rocks around an entrance?

Choose an entrance-rock arrangement and assign suitable lightweight Static Meshes from your project. Adjust Rock size, connect and inspect the passage. The pieces are separate actors, so you can make final placement adjustments in the level after the last reconnect.

How do I place a group of floating islands?

Choose Floating islands, set a whole source shape or Choose by seed, then enter the number and Group radius. Set its size envelope and position, inspect the preview from above and below, and Add to the level. Read a selected island's settings when editing it afterwards.

How do I choose a lightweight custom island?

Use a complete source mesh up to 20,000 triangles for ordinary islands, or up to 30,000 for a particularly large complex shape. Keep the group total within 480,000. The supplied eight shapes use 19,800 triangles each at their closest LOD and include lighter distance levels.

How do I set a lake or lagoon level?

Open Water, choose the water system and set Water elevation in world metres. Set a positive depth and compare the level with the terrain base and lowlands. For a new Archipelago, Lake Basin or Atoll, set these values before generation and inspect the shoreline.

How do I refresh water after sculpting?

When using a compatible linked-water provider, select its Landscape and choose Update linked water. Load the terrain area first, then inspect the shore. Use the native water tools for a Landscape using Unreal Water. Save the updated level and assets.

Which preview should I use before creating?

Use Surface for appearance, Clay for the outline, Slope for climbs and Wireframe for ground layout. For caves, add Passage plan and cutaway. Use a lighter preview while composing, then a higher preview quality for smaller forms. Inspect the actual created level before saving your preferred result.

How do I get back to a useful camera view?

Use Frame preview to show the terrain or complete island group again. Use Focus entrance for a structure's mouth, and switch 2D/3Dfor a plan or angled view. These controls help inspect the setup before creating or applying an edit.

What should I save before closing Unreal?

Save the Terra recipe for your generation settings, then use Unreal Save All for the level, meshes, materials and textures. Keep referenced custom assets with the project. A good name now is much kinder than finding three different files called Final tomorrow.

Pautinka

Need a hand with your world?

Send the tool name, your Unreal version, the settings and a clear screenshot. A good picture saves three rounds of “which mountain?”.

Contact Pautinka
↑

Search the functions, settings and questions in this language.

Save image ↓
Contents